Discover Modern Craftsman Homes in Kemptville and Kinburn with Sunter Homes
Welcome to Sunter Homes, Ottawa’s premier award-winning builder renowned for high-quality construction and exceptional client experiences. We are excited to introduce our latest projects in the beautiful neighbourhoods of Maplestone in Kemptville and Stonewalk Estates in Kinburn, both designed in the timeless Modern Craftsman architectural style.
Embracing Modern Craftsman Design
The Craftsman style originated in the early 20th century as a reaction to the Industrial Revolution, emphasizing handcrafted quality and natural materials. In America, Gustav Stickley was instrumental in popularizing this style through his magazine, The Craftsman, highlighting the harmony of functionality and beauty. Low-sloped roofs, wide front porches, exposed roof rafters, and the use of natural materials such as wood and stone characterize Traditional Craftsman homes.
Modern Craftsman homes blend traditional elements with contemporary features, such as larger windows, open kitchens, and eco-friendly materials. This fusion creates beautiful, practical homes that align with today’s lifestyle needs.
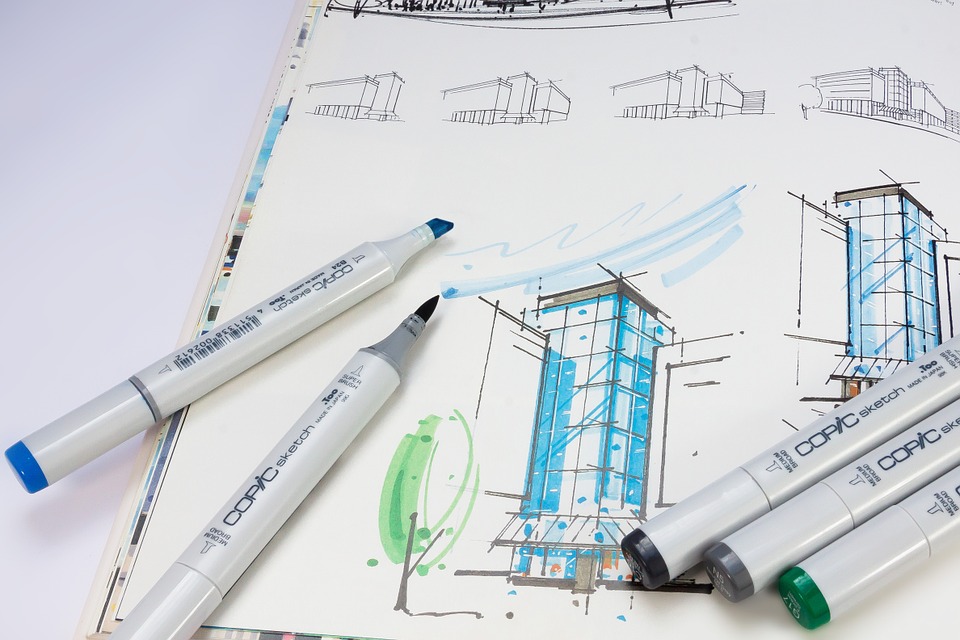
Our Partnership with Bell+Associates Architecture
We are proud to partner with Bell+Associates Architecture, a firm with over 35 years of experience designing stunning Modern Craftsman-style homes and cottages. Over the next two months, Bell+Associates will provide schematic design drawings, 3D renderings, and detailed floor plans that will complement the natural surroundings of our new lots. These designs will soon be available for viewing on our website.
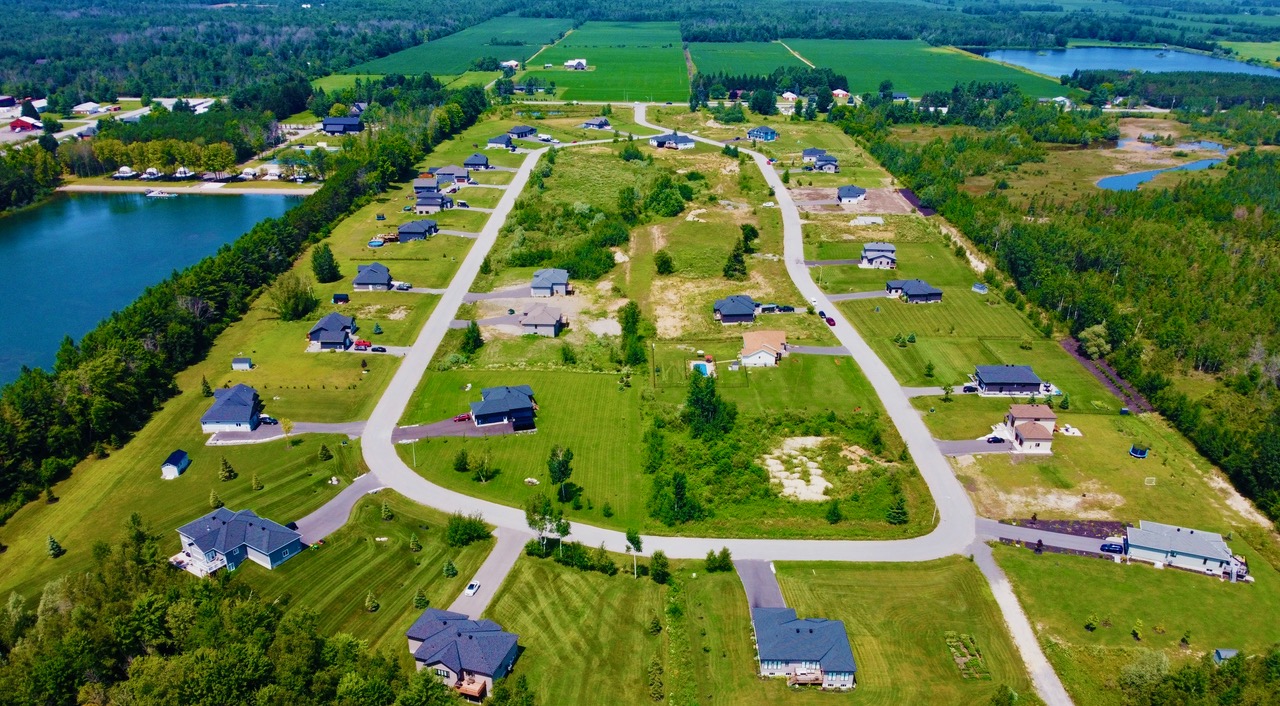
Introducing Maplestone in Kemptville
Maplestone is a picturesque countryside community located just 30 minutes south of Ottawa. This neighbourhood features 1-acre lots, perfectly blending natural beauty and modern living. It is an ideal place for families looking to enjoy the tranquillity of rural life with easy access to city amenities.
Discover Stonewalk Estates in Kinburn
Stonewalk Estates, situated 30 minutes west of downtown Ottawa, offers 2-acre lots in a more forested and private setting. This community is designed for those who seek a serene environment close to the city, providing the best of both worlds.
Recent Market Changes
In response to recent economic developments, the federal government has introduced 30-year amortization periods for insured mortgages on newly built homes, effective August 1, 2024. This change will lower monthly mortgage payments, making homeownership more accessible for young Canadians and first-time buyers.
Additionally, the Bank of Canada has reduced its policy interest rate twice recently, bringing it down to 4.50%. This reduction has led to lower prime lending rates, easing the financial burden on new homeowners and making it an opportune time to invest in your dream home (WOWA) (CTV News) (Global News) .
Contact Us
Our knowledgeable and friendly sales team, "The BIG GUYS" from Keller Williams, are ready to help you secure your preferred lot in these beautiful communities. Don’t miss the opportunity to choose the best lot available.
Realtor Contact Information:
- Aud Eimantas REALTOR®
- Phone: 613.878.7781
- Email: aud.eimantas@gmail.com
- Mark Hendrycks REALTOR®
- Phone: 613.809.0369
- Email: markhendrycks@gmail.com
Let’s make your dream home a reality with Sunter Homes.
Green Living: Top Features in Canadian Eco-Friendly Homes
When you think about your dream home, it's not just about the stylish layout or the stunning views. It's also about building a future for yourself and the planet. That's why eco-friendly features in homes are becoming not just a nice-to-have but a must-have. Especially here in Canada, where nature's beauty surrounds us, it makes sense to live in a way that preserves it.
And as we move through 2024, green technologies are no longer a thing of the future—they're here, now, and accessible.
Innovative Insulation Options
Staying warm during those Canadian winters is top of mind for any homeowner. But how do you keep the cold out, the warmth in, and your energy bills down? Innovative insulation.
Insulated Concrete Forms (ICFs) are revolutionizing how we build walls. These innovative blocks, panels, or planks made of rigid foam aren't just put in place for structure; they're filled with concrete and act as a powerhouse duo of strength and insulation.
What's incredible about ICFs is their ability to increase your home's insulation values drastically. This means less energy is needed to heat your home, which translates to lower bills—something every homeowner loves to hear.
But beyond the cost savings, the tighter air seal provided by ICFs contributes to a more consistent temperature throughout your home, reducing the hot and cold spots that are all too common in traditional builds.
Let’s not forget the additional benefit of insulation: soundproofing. The thick, continuous insulation layers dampen sounds outside, making your home a tranquil oasis.
Sustainable Heating Solutions
How you heat your home is just as important as keeping that heat from escaping. Sustainable heating solutions like radiant floor heating systems and geothermal energy are changing the game.
Imagine stepping out of bed in the middle of February onto toasty, warm floors. Sunter Homes can help you experience the luxury of radiant floor heating: a network of tubes runs beneath your floors, carrying heated water that warms your toes and your entire home. It's energy-efficient because it directly heats what you want, where you want, eliminating the loss that happens with traditional forced-air systems.
Geothermal systems take it further by tapping into the Earth's natural heat. Below the frost line, the ground stays at a relatively consistent temperature year-round, and geothermal technology leverages this to heat and cool your home. A geothermal heat pump with an air handler uses a fraction of the energy of a conventional HVAC system but provides you with comfortable temperatures no matter what's happening outside.
Water Efficiency Technologies
Water is one of our most precious resources; every drop counts in your home. From the kitchen faucet to the garden hose, advances in water efficiency technologies mean you can enjoy the same comforts while using less.
Take water storage tanks, for example. These aren’t just any tanks; they’re part of a system that collects rainwater from your roof, filters it, and repurposes it for your garden or toilet. This way, you're not just saving on your water bill but also reducing your dependence on municipal sources and ensuring that every time you water your plants, you’re not tapping into—and paying for—treated drinking water. Sunter Homes specializes in integrating these advanced water-saving systems, ensuring your home is both luxurious and environmentally responsible.
Let's talk about the fixtures that are changing the game in water conservation, too. Low-flow toilets, showerheads, and taps are designed to use significantly less water than their standard counterparts without sacrificing performance. By installing these in your home, you're making a choice that benefits both the environment and your wallet.
But water-saving tech continues beyond fixtures. Greywater recycling systems are becoming a homeowner's best friend. They take water from showers and sinks—not toilets, don't worry—and recycle it for non-potable uses. It's a smart way to reduce waste and make the most of every litre.
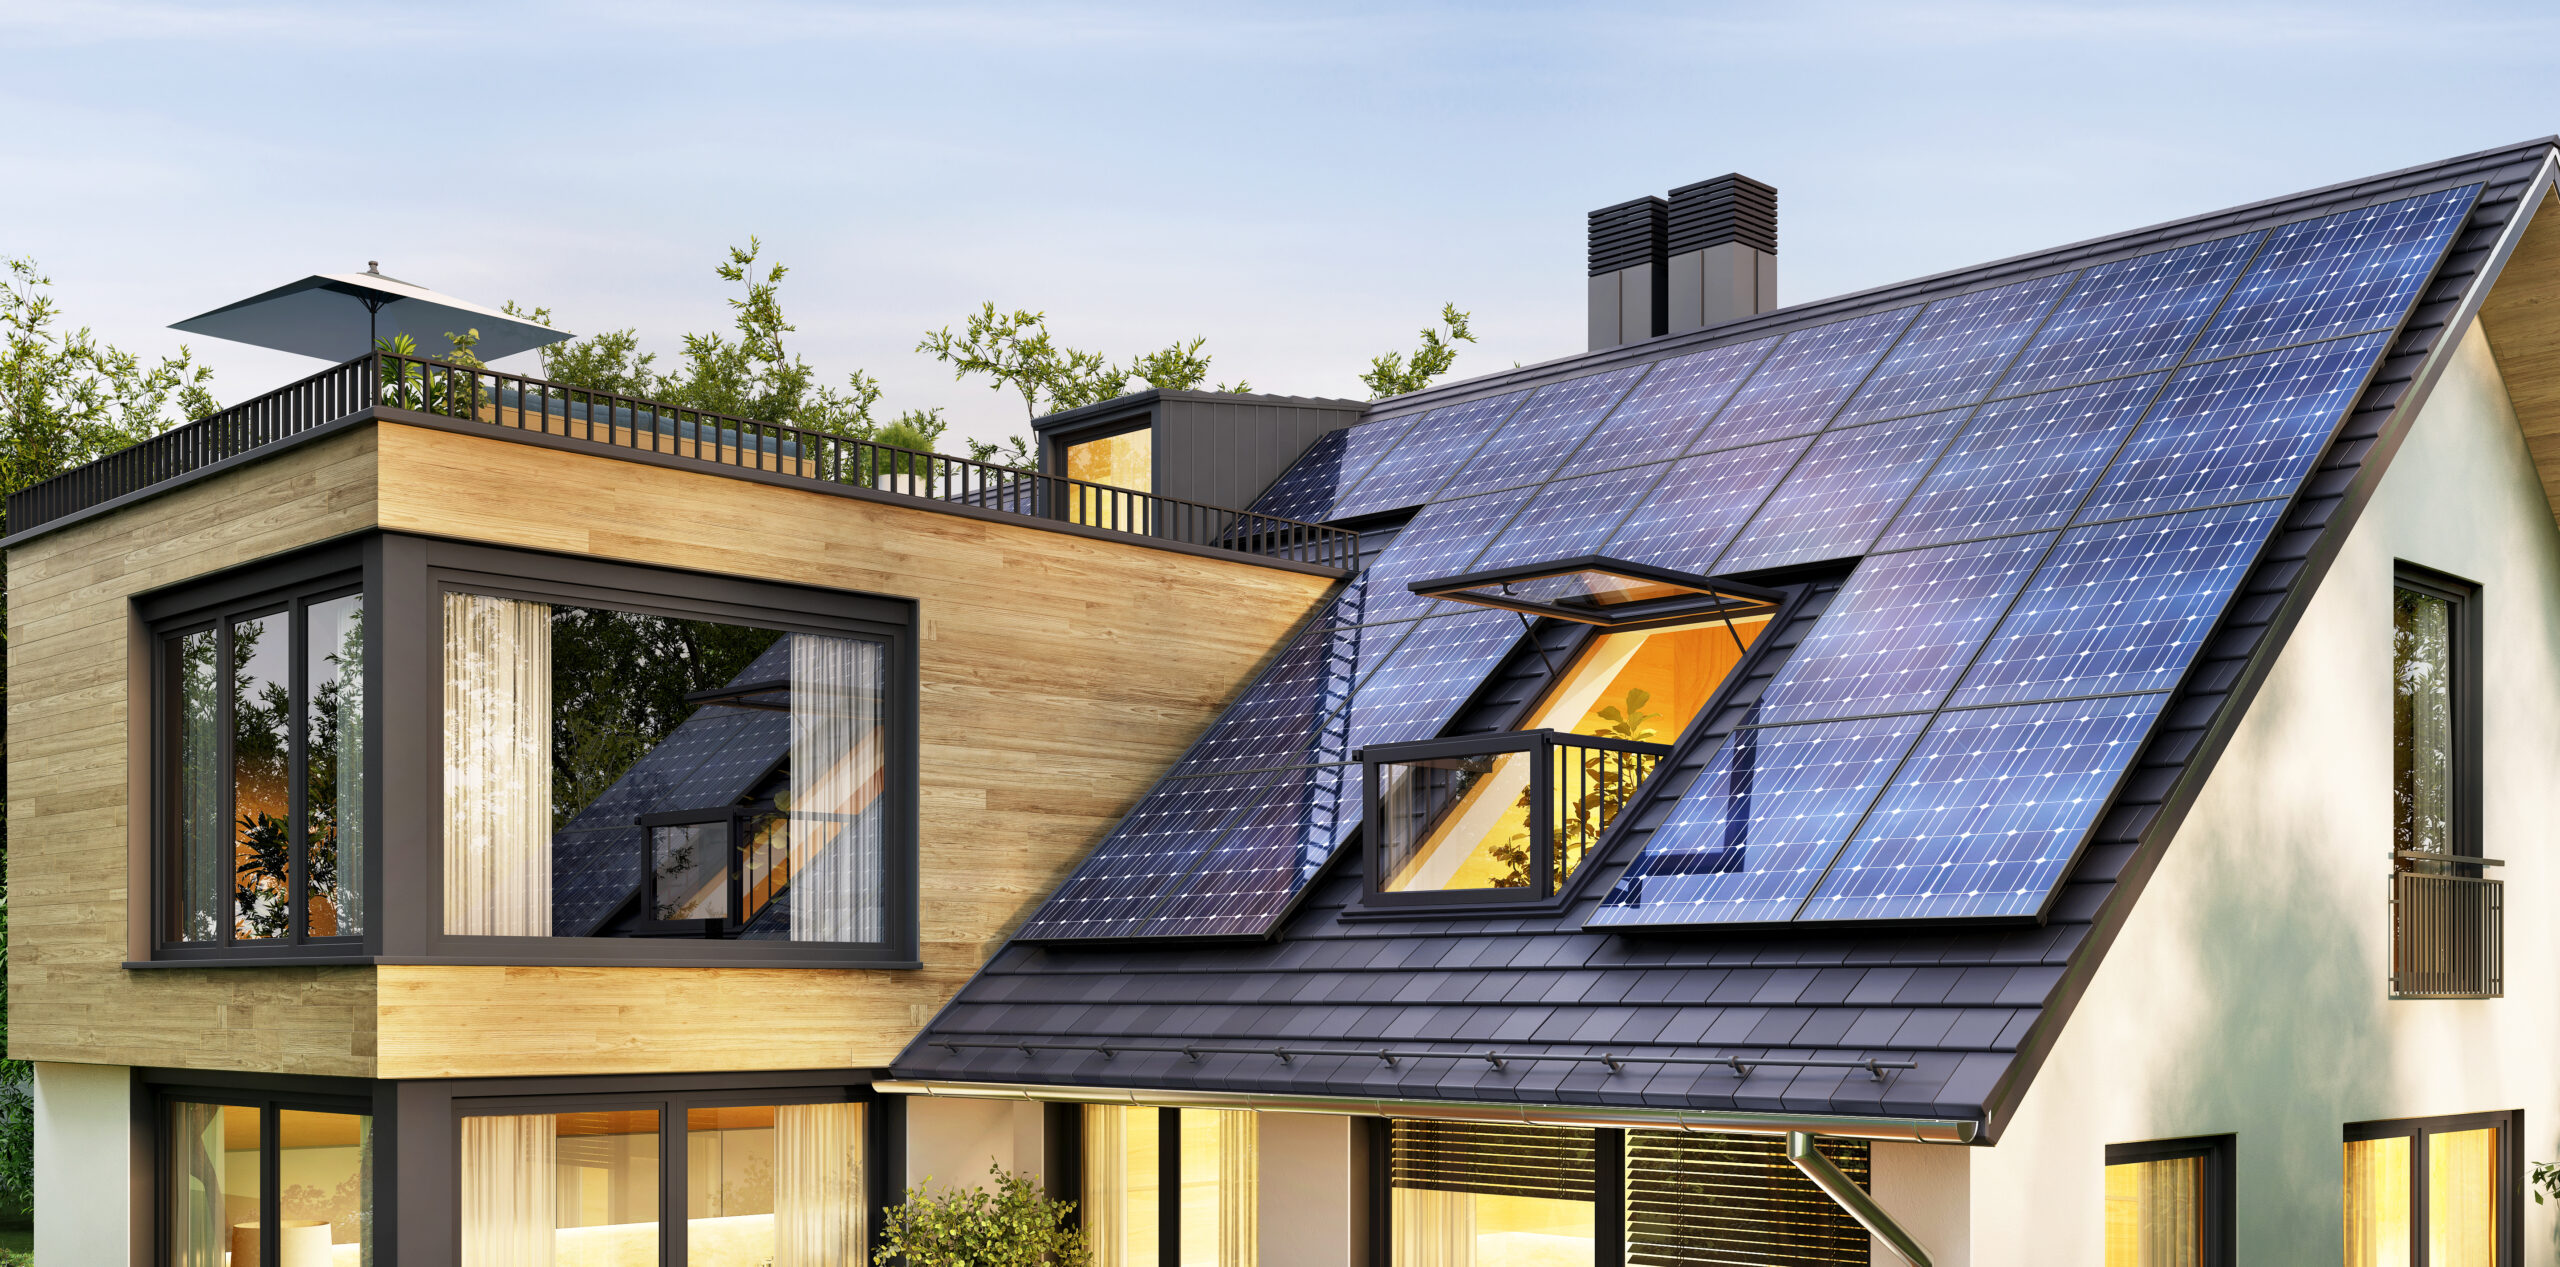
Renewable Energy Integration
The sun that beams down on your home is more than just natural light; it's an energy source waiting to be harnessed.
Photovoltaic systems, or solar panels, are becoming a staple on rooftops across Canada. These systems turn sunlight into electricity to power everything from your fridge to your phone charger. These systems come in various sizes to fit different energy needs and roof spaces. Still, they all work towards a common goal—reducing reliance on the grid and lowering electricity costs.
The incentives available, like the microFIT program in Ontario, make going solar even more appealing in Canada. This program helps offset the initial investment in solar panels and allows you to profit by selling your surplus energy back to the grid.
Yes, you read that right. Your home could generate more power than it uses, and the excess could make you money while also contributing to a greener community. So, with solar panels, you're not just powering your home; you’re powering a movement towards a more sustainable future for all.
Working with a visionary home builder like Sunter Homes means having access to the latest solar technology and assistance in navigating incentive programs like microFIT, making the transition to renewable energy seamless.
Indoor Air Quality and Ventilation
Breathing easy in your home is about more than just comfort; it's about your health. That's where systems like Heat Recovery Ventilators (HRVs) and Energy Recovery Ventilators (ERVs) come into play. Especially in the cooler months when homes are sealed tight against the cold, the air inside can start to feel stale, and the level of indoor pollutants can be higher than the air outside.
These ventilation systems provide a continuous supply of fresh outdoor air while retaining the heat from the indoor air that's being expelled. It's like opening a window to let in fresh air without the chill.
HRVs and ERVs keep the air fresh and use less energy, which is good for both the planet and your monthly bills. When summer rolls around, an ERV can help keep the humidity level in your home balanced so you can stay cool without feeling damp. This improved air circulation can help reduce the symptoms of those with allergies or respiratory issues, truly making your home a sanctuary.
When it comes to keeping the air clean, chem-bio air wash machines are a homeowner's high-tech ally. After all the painting, sealing, and finishing are done in a new or renovated home, this machine cycles through the air, filtering out volatile organic compounds (VOCs) and other airborne particles.
You're left with air that’s not just fresh but practically scrubbed clean.
Smart Design for Sunlight Management
Sunlight is beautiful, but when it comes to your home, it's all about managing it smartly to maintain comfort and energy efficiency. This is where louvred sunshades shine.
Think of them as high-tech sunglasses for your home. They automatically adjust to let in light and warmth in the winter while providing shade in the summer. This eco-friendly design saves you money on heating and cooling and adds to your home's curb appeal.
But strategic sunlight management isn't just about the outside of your home. Inside, intelligent design choices can make a world of difference to your home's thermal efficiency.
Think about high-performance windows that let in light while blocking UV rays that can heat your home in the summer. Or consider the placement of rooms and windows for passive solar heating—a design technique that takes advantage of the sun's natural warmth during cold months.
These intelligent designs do more than save on energy costs; they create inviting spaces filled with natural light that make your home not just a place to live but to thrive. The design experts at Sunter Homes can help you incorporate these innovative sunlight solutions and enhance your home's beauty and efficiency.
Heat Recovery and Efficient Drainage
Did you know that when you have a hot shower in colder months, you can recover the heat that is lost down the drain? That's what drain water heat recovery systems are for.
These ingenious setups reclaim heat from the water you've already used to warm the cold water which enters your water heater or other plumbing fixtures. It's a clever way to cut down on energy use, and because they mostly use gravity and heat exchange, there are no moving parts to worry about.
In your eco-friendly home, every bit of efficiency helps, and drain water heat recovery contributes to that without you even noticing. You're saving energy and money without sacrificing a single drop of comfort in your daily routines.
Diagnostic Tools for Green Homes
So you've got all these eco-friendly features in your home, but how do you know they're working as well as they should be? Enter diagnostic tools, like the blower door test, to gauge how airtight your home is.
During this test, a powerful fan mounted into an exterior door frame blows air out of your house, lowering the air pressure inside. The higher outside air pressure then flows back into the house through all unsealed cracks and openings, revealing the areas where your home is letting heat escape.
Why does this matter? Air leakage can account for a significant portion of a home's energy loss, making your heating and cooling systems work harder than needed. With a blower door test, you can pinpoint and seal these leaks, ensuring your home's energy efficiency is top-notch.
Embracing a Sustainable Future in Home Design
Wrapping up our exploration of eco-friendly features in modern homes, it's clear that green living is no passing trend. It’s a comprehensive approach to home design that embraces efficiency, innovation, and a deep respect for the environment—all while maintaining the elegance and comfort you seek in your living space.
These features, from ground-breaking insulation options to cutting-edge ventilation systems, represent more than technical advancements; they're a testament to a lifestyle choice that prioritizes sustainability. By adopting water conservation practices, integrating renewable energy sources, and ensuring that your home is a paragon of energy efficiency, you're not just building a house—you're setting a standard for the future of residential living.
As you take these insights off the page and into your life, consider the impact that such choices have on your immediate environment and the broader canvas we all share. Each eco-friendly feature you implement is a step toward a cleaner, more sustainable world.
So, if you're ready to embrace these features in your home or want to discover more about green home design, reach out to the experts.
Sunter Homes is at the forefront of sustainable home building, and our team is equipped to guide you through the journey of creating an eco-friendly home that doesn't just meet today's standards but is ready for the innovations of tomorrow.
Let your home be a testament to your commitment to green living and an inspiration to everyone charting their own course toward sustainable living.
Trends in Luxury Home Design
Luxury home design is much more than just eye-catching features and plush interiors. It's about crafting spaces that reflect your personal success and style—places where comfort meets functionality. It's not just about looking grand; it's a perfect blend of new architectural styles and decor that keep up with how we live and the technologies we use today.
With more people working from home and thinking greener, luxury homes have evolved. They're designed to fit exactly how you live, with an emphasis on being eco-friendly, efficient, and smart, without sacrificing any of the elegance that makes your home uniquely yours.
Sustainable and Eco-Friendly Designs
Sustainability is now a key aspect of building high-end homes, with eco-friendly designs appealing to homeowners who are mindful about their environmental impact.
The goal is to live in glamour while being kind to the planet, and construction methods are advancing to make this possible with eco-conscious materials that still exude luxury. When you think of energy-saving features and green materials, you might not immediately associate them with beauty. However, architects are skillfully blending these elements, like reclaimed wood and natural stone, into exquisite home designs. These choices reflect your care for the environment and match your wish for a modern, luxurious home.
Saving energy is essential in today's world, and homes are now being designed with this in mind. Incorporating solar panels, ground-source heat, and top-notch insulation is becoming standard for luxury homes, ensuring they're as efficient as they are inviting.
These innovations keep your home comfortable, lower your energy usage, and support a cleaner environment, all while maintaining a sense of sophistication and luxury.
Smart Home Technology Integration
Exploring the trends in upscale home design, you'll see how smart home technology has become essential, harmonizing convenience, safety, and custom entertainment.
Modern luxury homes are adopting these advanced systems as a norm, and homeowners, like you, expect a living space that's as technologically connected as it is cozy. Imagine tailoring every aspect of your home to your liking with utmost precision. You can have climate control that learns your schedule, lights that create the perfect ambiance for any event, and sound systems that bring the movies to you. Smart technologies provide this level of detail, working discreetly to make your home more intuitive and your life easier.
Integrating smart tech into your home takes careful planning to make sure it fits with your home's look and feel. The goal is to have all the tech—wires, screens, speakers—blend into your home's design seamlessly. This blend is where architects and designers excel, making sure your smart home functions brilliantly without ever taking away from your home's luxurious feel.
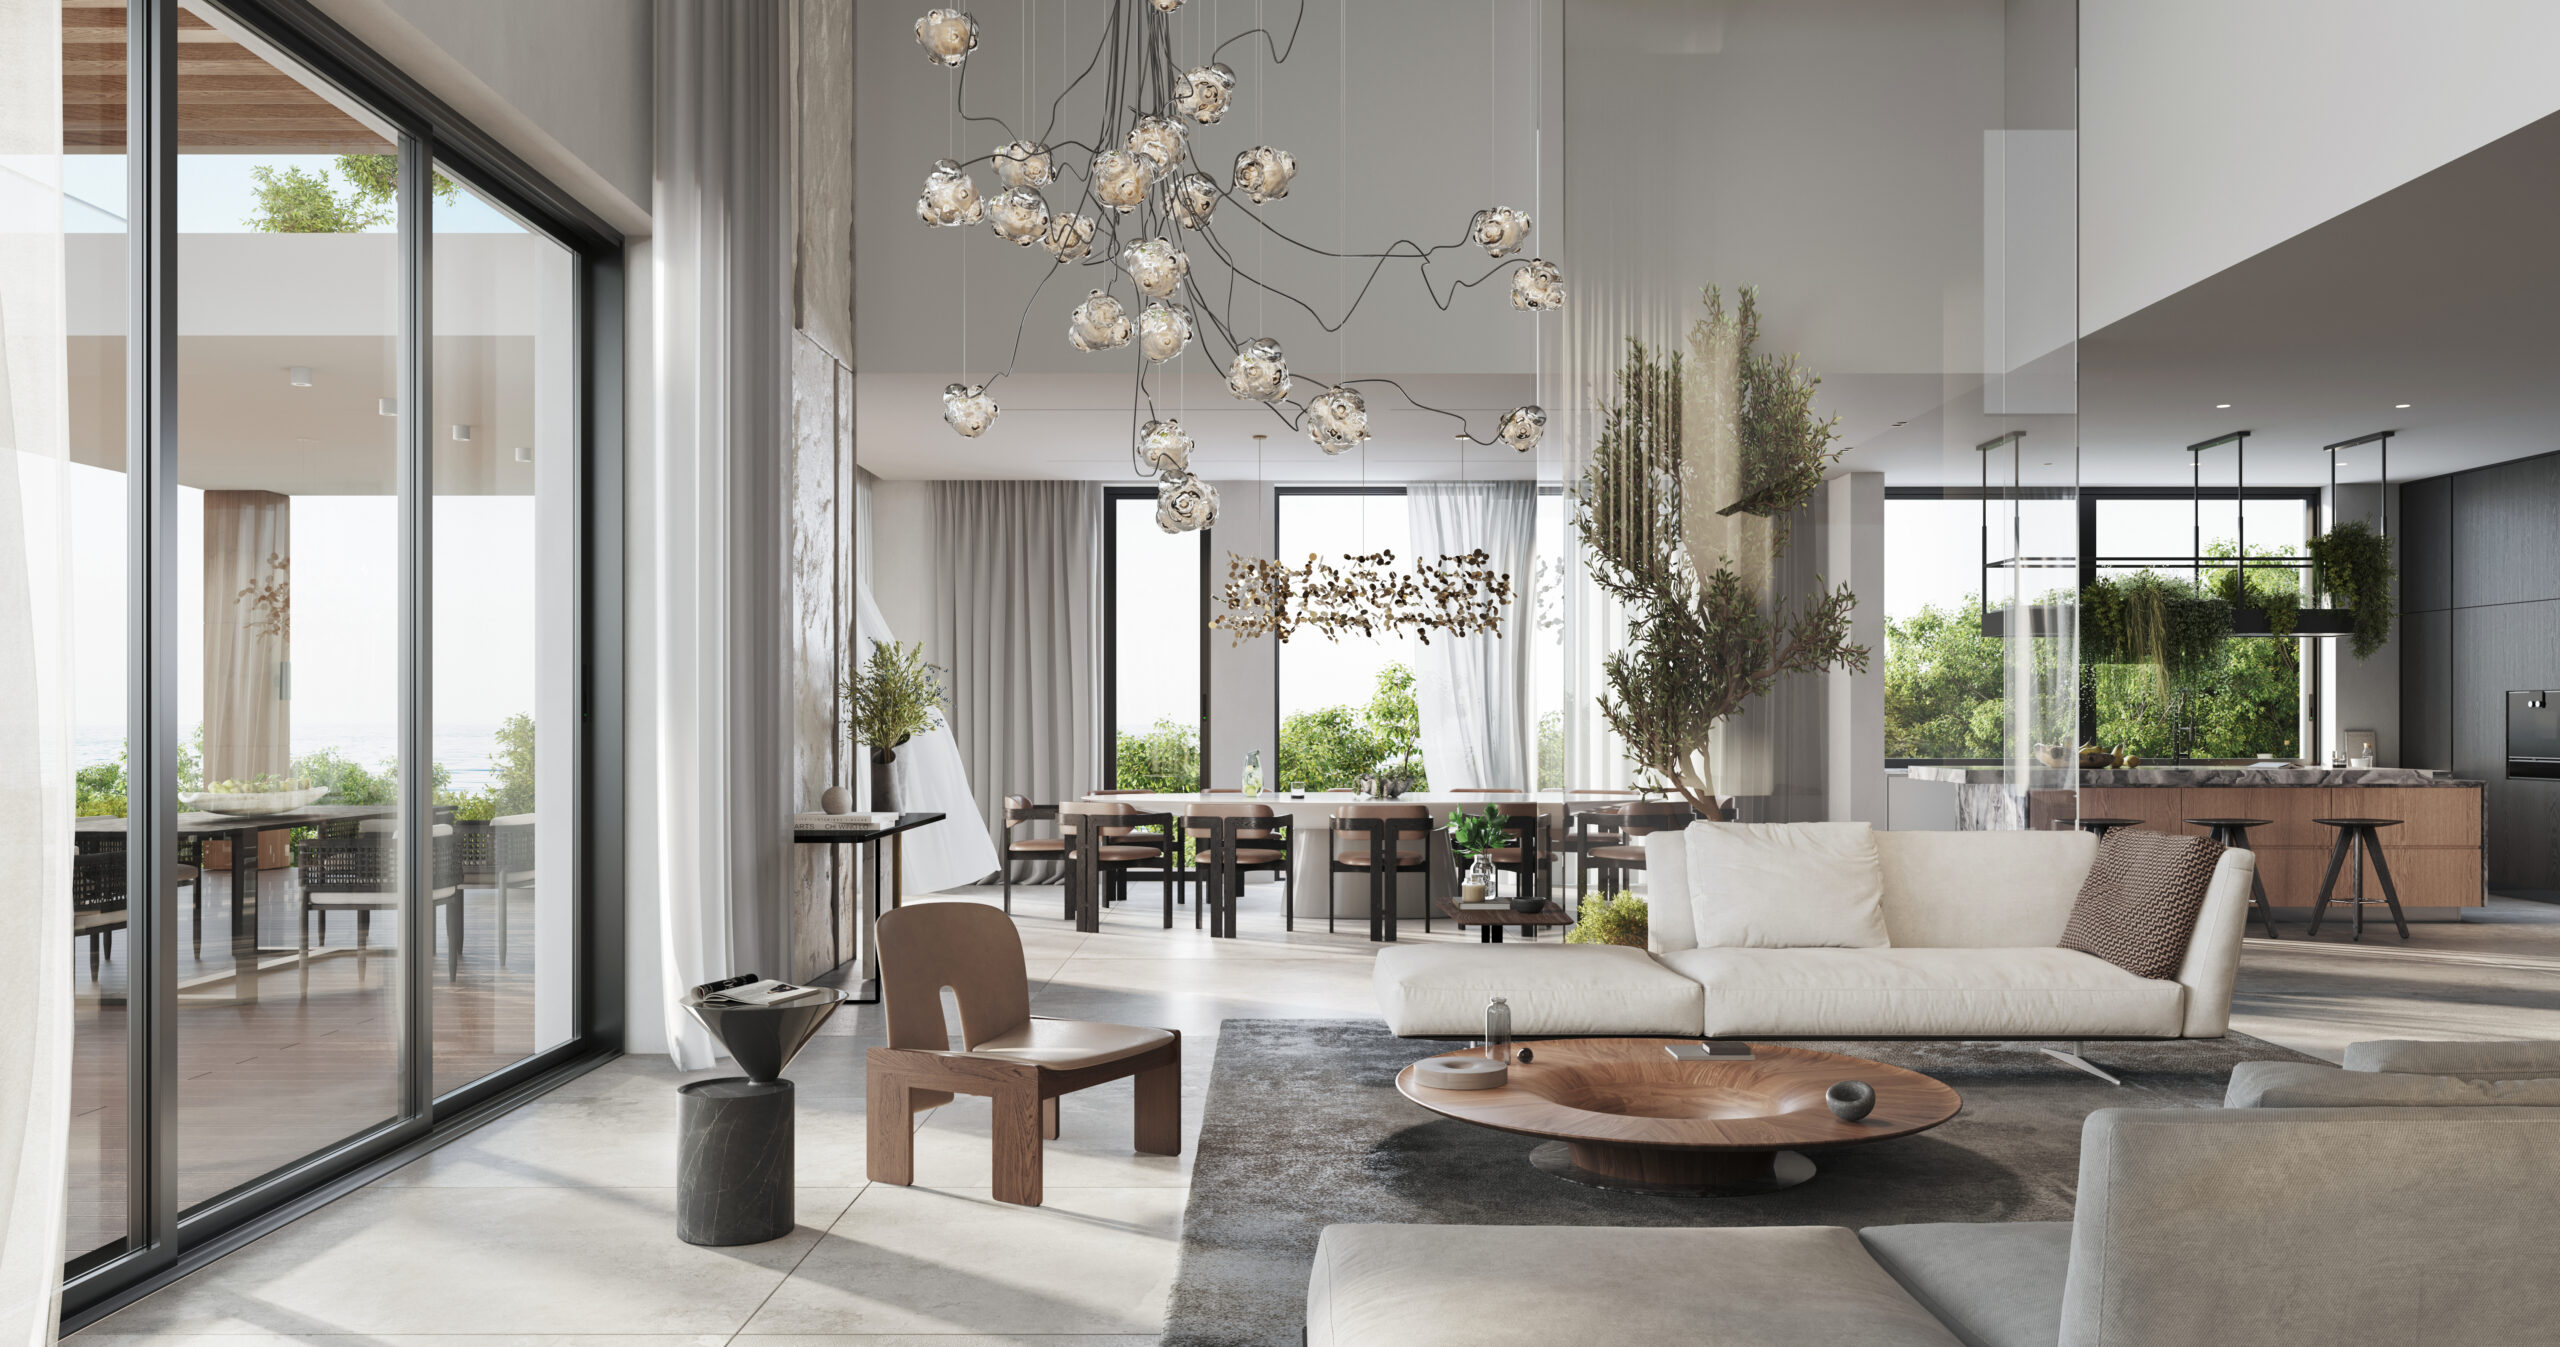
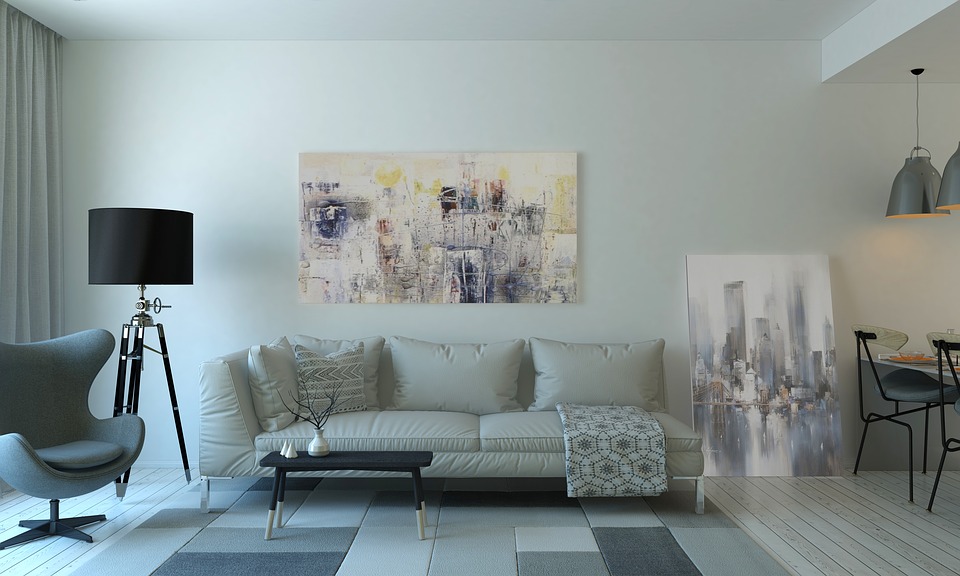
Open Concept Living Spaces
The allure of open-plan living remains a prominent feature in luxury homes, as it caters to a lifestyle that values spaciousness and social connection.
The elimination of barriers between the kitchen, dining, and living areas creates a grand central space ideal for gathering, entertaining, or simply enjoying day-to-day life with family. Designing these areas requires a careful approach to maintaining a sense of order and distinction within the broader open space. Architects achieve this by employing subtle dividers—a two-sided fireplace, a change in flooring material, or a strategic furniture arrangement—that delineate each area without disrupting the flow. Such design choices allow you to host vibrant social events as easily as you enjoy quiet family moments, all within the same versatile space.
The key to successful open-concept living lies in the details. High ceilings, large windows, and consistent material palettes enhance the expansive feel, while advanced acoustic solutions ensure that the openness doesn't come at the cost of tranquillity. By thoughtfully planning these spaces, architects ensure that your home reflects a modern sensibility, offering both the luxury and practicality that align with upscale living today.
Indoor-Outdoor Living
The seamless blend of indoor comfort with the allure of the outdoors continues to be a defining trend in luxury home design. Here, you can move around effortlessly - from the open-plan kitchen to a sun-drenched patio, or from your luxurious living room to a verdant backyard sanctuary. This concept of indoor-outdoor living extends the functional and aesthetic boundaries of your home, providing spaces where you can enjoy the natural environment without sacrificing the conveniences and comforts of the indoors.
Architects are crafting these transitions using large patio doors that disappear into walls, expansive windows, and covered terraces, ensuring a visual and physical connection to outdoor spaces. Kitchens with fold-away walls open up to outdoor cooking areas, while dining spaces flow out to al fresco settings with ease. It's about creating environments where entertainment and relaxation are not confined by traditional boundaries, allowing you and your guests to experience the best of both worlds.
Moreover, materials and design elements are selected for their durability against the elements and their ability to complement the interior aesthetic.
From natural stone flooring that extends from inside to outside, to all-weather furniture that matches your indoor decor, every element is chosen to enhance the continuity between your home's interior and exterior.
Bold and Personalized Interiors
Luxury is deeply personal, and this is especially true when it comes to the bold and unique interiors of today's high-end homes. Homeowners are choosing designs that truly reflect their individual style and tell their unique stories. Gone is the one-style-fits-all mentality, replaced by courageous and individual choices in home design.
The result is a diverse palette of colours that bring spaces to life — rich navy blues, vivid emerald greens, and soft, warm golds. Textures are also key in making these spaces truly your own. The combination of smooth, cool marble with soft fabrics and raw finishes adds a touch that you can both see and feel.
Statement pieces — a striking chair, a piece of art, or an unusual light fixture — become the heart of these personalized spaces. They do more than just fill a room; they start conversations, set the ambiance, and showcase your unique flair. These elements transform your space into an environment that’s truly in tune with who you are, with every nook showing off your personality and every carefully chosen detail reflecting your taste for the finer things.
With these individual touches, your home becomes more than just a place to live. It turns into a personal showcase, reflecting your journey, dreams, and everything you cherish.
Luxury Wellness Spaces
As the concept of wellness extends beyond the spa and into the home, luxury homeowners are dedicating spaces to health and relaxation by creating their personal spa retreats. These wellness spaces are meticulously designed to provide not only functionality but also serenity and opulence within the comfort of your own home.
Spa bathrooms are evolving from functional rooms to expansive, lavish sanctuaries with features like oversized rain showers, deep soaking tubs, and even saunas or steam rooms. Materials are selected for their ability to create a tranquil atmosphere—think natural stone tiling, teak wood accents, and mood lighting. It's about crafting an environment that can transport you from the hustle of daily life into a realm of rejuvenation and luxury.
Home gyms, too, are not just about the equipment; they reflect a design that motivates and uplifts.
Proper ventilation, natural light, and views of the outdoors are becoming standard aspects of the custom home gym design, making your exercise routine an immersive experience. With the addition of a juice bar or a lounge area, your fitness space becomes an integral part of your home's wellness retreat.
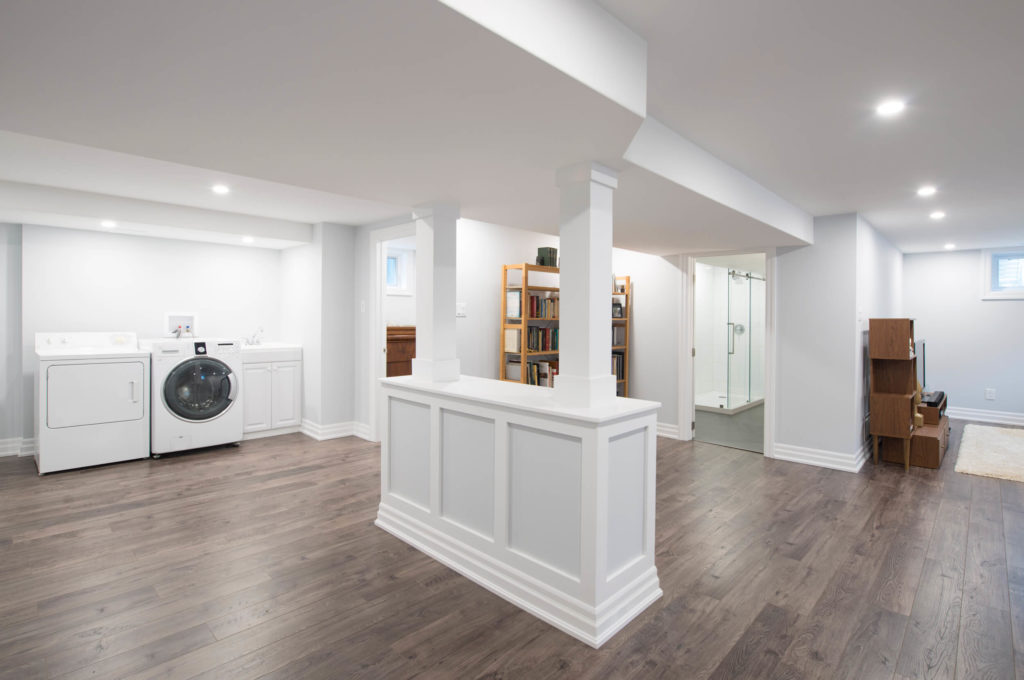
Multifunctional Rooms and Adaptive Design
The luxury home of today must be as versatile as it is beautiful, with rooms designed to serve multiple purposes. The rise of multifunctional rooms reflects a lifestyle that values both utility and aesthetics. Whether it's a home office that doubles as a guest room or a basement that serves as an entertainment hub, these spaces are designed to adapt to your changing needs.
Multifunctional rooms require ingenious solutions—movable walls, hidden storage, and convertible furniture—that allow the space to transition seamlessly from one use to another.
These design elements enable your home to accommodate various activities, from work and study to leisure and entertainment, without sacrificing style or comfort. The key to success in creating these adaptive spaces lies in foresight and flexibility. It's about anticipating the various ways you might use a room and incorporating those possibilities into the design from the beginning. By doing so, your home remains not only functional for today's needs but also adaptable for tomorrow's.
This approach ensures that every square foot of your residence is utilized to its fullest potential, making your home as efficient as it is exquisite.
Conclusion: Embracing the Future of Luxury Home Design
Reflecting on the latest trends in luxury home design, we see that homes are becoming both eco-friendly and deeply personal.
Sustainable living is merging beautifully with high-end design. Smart technology is creating homes that respond to your voice, providing unparalleled convenience and security. Open floor plans and indoor-outdoor living spaces deliver flexibility and a connection to the natural world, all while maintaining a sense of luxury.
At Sunter Homes, we understand that luxury is about more than just impressive features; it’s about crafting spaces that embody your unique style and enhance your daily life. Wellness spaces and multifunctional rooms are rising in popularity, demonstrating a shift towards homes that adapt to your evolving needs with elegance and sophistication.
These trends suggest a future where luxury home design is about curating personal experiences and spaces that honor your individual journey.
As Sunter Homes guides you through these choices, each decision brings you closer to a home that is not only in tune with current trends but also intimately yours—a sanctuary where you don't just live but truly thrive.
The Essential Checklist for New Home Construction
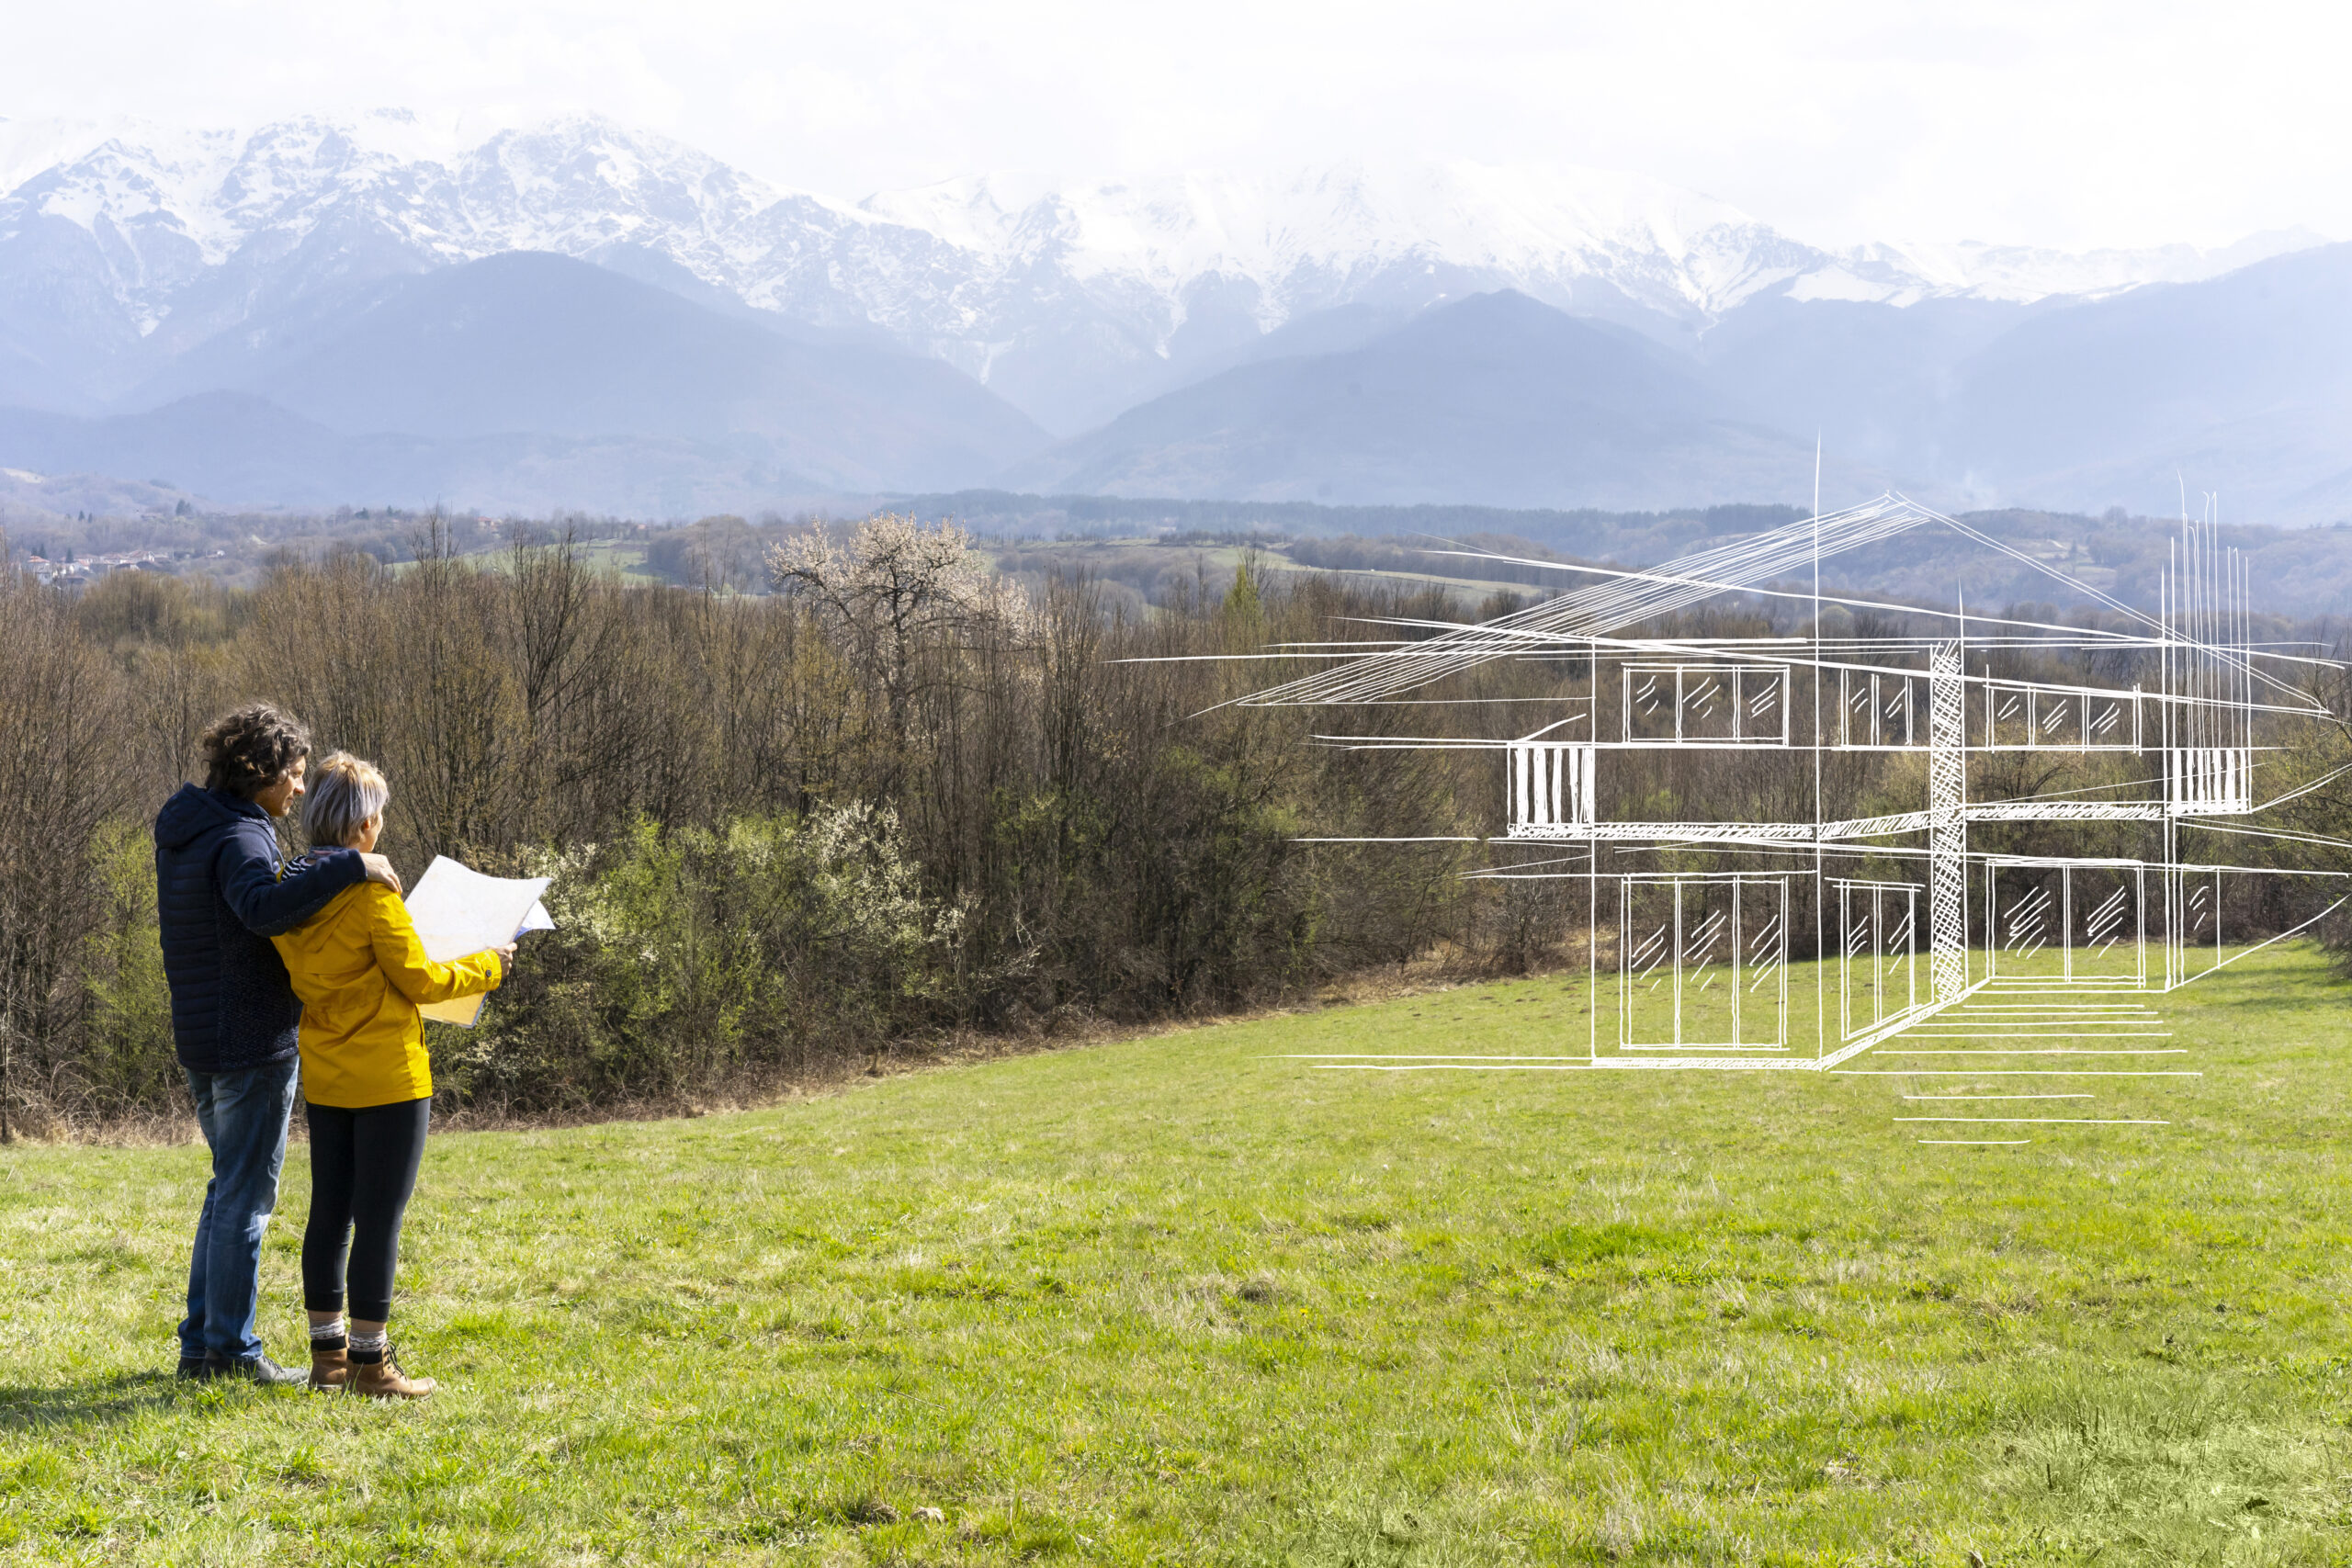
The decision to build a custom home is the beginning of a remarkable and personal journey. It's a path that leads to a place where every corner, every detail, and every space is a reflection of your distinct style and preferences. Constructing a custom-built luxury home in Ottawa is an endeavour that demands more than just a financial commitment; it's an investment in your future and a canvas for your aspirations.
The process of bringing your vision to life starts with a blueprint of thoughtful planning and careful decision-making. Each step, from the initial sketches to the final touches, calls for attention to detail and an understanding of the bigger picture. It's about more than erecting walls and choosing finishes; it's about creating an environment that enhances your quality of life and stands as a testament to your accomplishments.
To ensure that the final structure is everything you've dreamed of and more, it's essential to start with a solid foundation—not just in construction but in the planning phase. Every decision you make, from the location of your home to the materials used in its construction, needs to be guided by a clear intent and a strategic approach.
This initial phase sets the stage for the entire project and is crucial for a smooth transition from concept to reality.
Understanding Your Needs: Lifestyle and Long-term Goals
The cornerstone of a custom home is its ability to meet your needs, both for today and for the future. Before you even begin to consider designs or materials, take a step back and reflect on what your ideal lifestyle entails.
Ask yourself about the kind of spaces you want to live in, the way you entertain, how your family interacts, and what your home needs to offer to support your day-to-day activities. Your custom home should be a place that grows with you, accommodating life changes and evolving needs. Perhaps you dream of a gourmet kitchen where you can host dinner parties, a home theatre for family movie nights, or a home office that provides a sanctuary for productivity. Or maybe you're thinking ahead to accessibility features that will allow you to enjoy your home comfortably for years to come.
Assessing your needs goes hand-in-hand with setting clear long-term goals. These goals might include planning for a growing family, creating a home that will remain functional as you age, or even how your home can adapt to advancements in technology. By envisioning the life you aim to lead, you can craft a plan that lays out the necessary features your new home should include. This plan serves as a guide not just for you, but for the architects, designers, and builders who will be bringing your dream to life.
Incorporating these personal and practical considerations into your home's design ensures that the end result is a space that's not simply beautiful, but also deeply resonant with your way of life.
Choosing the Perfect Lot: Location, Location, Location
The adage "location, location, location" holds profound truth when it comes to building a custom home. Your choice of land sets the stage for your future residence and is as critical as the design and construction that will follow.
When selecting the perfect lot for your new home, several factors demand your consideration. The location's appeal is more than just its proximity to amenities or the beauty of its surroundings; it's about how it will integrate with and enhance your lifestyle.
Begin by contemplating the environment you envision around your home. Are you drawn to the tranquillity of a lakeside retreat, the sweeping views of a hilltop estate, or the convenience and vibrancy of an urban setting?
The terrain itself plays a crucial role as well. The lay of the land can affect not only the construction of your home but also the possibilities for landscaping and outdoor living spaces. The character of the neighbourhood and the community should likewise resonate with your preferences for privacy, security, and socio-cultural environment.
Also, keep in mind that zoning regulations and bylaws can significantly influence your plans. Understanding what is permissible in terms of construction, renovations, and additions is essential before purchasing a lot. This ensures that your vision for your home is achievable and compliant with local policies. Matters such as property taxes, easements, and environmental regulations are also key considerations that could impact how you enjoy your home and what you can build.
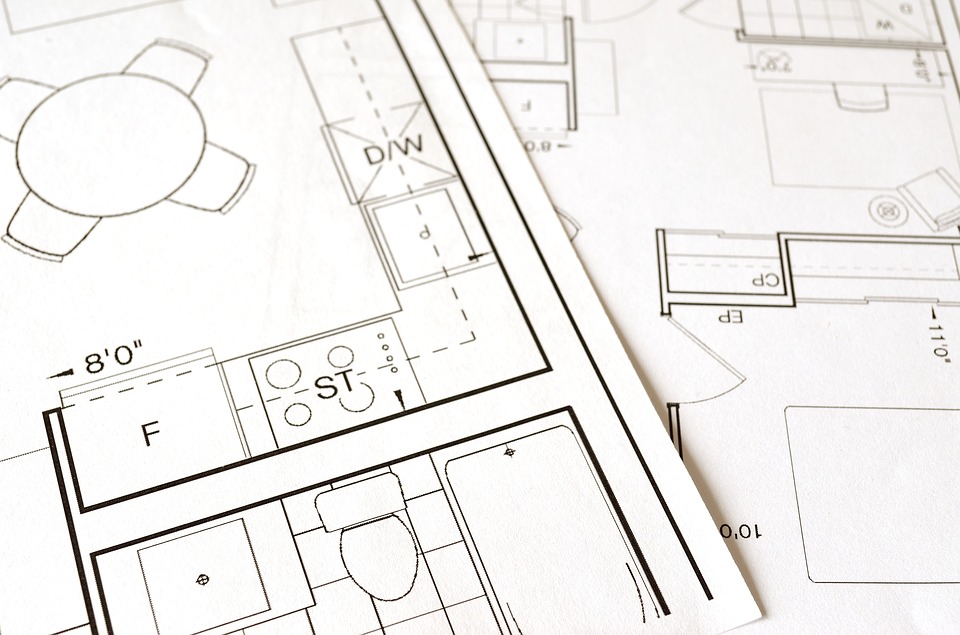
Designing Your Space: Home Architecture and Design Basics
Once the location for your home is decided, the next exhilarating phase begins: designing your space.
Collaborating with an architect and design team, such as Sunter Homes, will transform your ideas into a structured plan that will eventually materialize into the bricks-and-mortar of your luxury home. Your home should be a sanctuary, a place where every room and space is optimized for your comfort and suited to your day-to-day activities. The architectural design sets the framework for the interior, dictating how each room flows into the next, the placement of windows to capture natural light, and even the integration of technology to fit a modern lifestyle. It's these decisions that ensure your home is not only visually stunning but also inherently livable.
Functionality is equally critical. You'll want to discuss with your designers how the layout can accommodate entertaining guests, providing privacy for family members, or even adapting to future needs as your life evolves. Every element, from the height of the ceilings to the choice of heating systems, should align with your preferences.
At this juncture, it's beneficial to also think about sustainability and efficiency.
Modern building codes in Canada prioritize energy conservation, and incorporating these practices into the design of your home—whether through the use of eco-friendly materials or by employing renewable energy sources—can provide long-term benefits both environmentally and financially.
The design of your custom home is a reflection of your taste and an embodiment of your lifestyle. It serves as the blueprint for every new decision later on, ensuring the final product is a home that not just meets, but exceeds your highest expectations.
Selecting the Right Builder: Quality and Compatibility
The construction of your custom luxury home is not a task to be taken lightly, and choosing the right builder is paramount to the success of your project. This decision goes far beyond a simple transaction; it is about forging a partnership with a professional who will bring your vision to life. The builder you choose must not only possess the required skills and experience but also share your commitment to quality and attention to detail, a trait which Sunter Homes shares with you.
When vetting potential builders, it is essential to delve into their portfolios and past projects. This will give you an insight into their craftsmanship, their expertise in working with the materials and styles you prefer, and their ability to execute complex designs.
Equally crucial is the builder's ability to communicate and work with you. Transparent and frequent communication is the bedrock of a successful build. Throughout the construction of your home, you'll need to make countless decisions and will want to be informed of progress and any challenges that arise. Ensure that the builder you select values collaboration and is someone you feel comfortable having ongoing discussions with, as this will be a relationship that lasts for the duration of your build and beyond.
A builder's values are just as important as their skills. Your builder should be committed to sustainable building practices and demonstrate respect for the environment, aligning with modern building standards and your desire to create an energy-efficient home. The right builder will not just work for you but with you, sharing the journey to achieve the extraordinary quality you expect in your new home.
Budgeting for Success: Financing and Cost Planning
While the dream of building a custom home is inspiring, the financial aspect is a practicality that cannot be ignored.
Establishing a comprehensive budget early on is essential. It’s not just about the costs you expect; it’s about planning for the unexpected and ensuring a buffer for those unforeseen expenses that inevitably occur during construction.
Begin by outlining all your known costs, including the price of the land, architect and design fees, construction costs, permits, and landscaping. Don't forget to factor in the interior elements, such as high-end appliances, sophisticated home systems, and custom finishes. Once you have these details, you'll want to add a contingency—usually an additional 10-20% of the total cost—to account for overruns.
Throughout the building process, it's crucial to actively manage your budget. Regularly review expenditures and remain engaged with your builder about costs. If adjustments need to be made due to changing material prices or design modifications, having a clear understanding of the budget will help make informed decisions without compromising the integrity and quality of your home. A well-planned budget not only keeps your finances on track but also reduces stress, allowing you to enjoy the creative process of seeing your custom home come to life.
Navigating Permits and Regulations: Staying Compliant
The process of building a custom luxury home isn't solely defined by design choices and material selections; it's also governed by a series of legal and regulatory requirements.
Navigating the permits and regulations is a critical phase that ensures your new home meets all standards set by local authorities. Compliance with these rules not only safeguards your investment but also helps avoid costly delays or legal issues down the line.
Familiarize yourself with the specific building codes and permits required in Ottawa or your particular municipality. These regulations will dictate numerous aspects of construction, so being ahead and knowing what you can and cannot do is crucial. Permits are a legal necessity and must be obtained before construction begins. The process can be intricate, involving submitting detailed plans and awaiting approval from various governmental departments. Your builder will typically handle this process, but staying informed and involved as a homeowner is beneficial.
Setting a Timeline: From Groundbreaking to Move-in Day
A realistic and well-structured timeline is the backbone of any construction project, particularly one as complex as a custom luxury home.
Establishing a timeline that captures all phases from groundbreaking to move-in day will help coordinate various trades, manage expectations, and keep the build progressing smoothly. A solid timeline not only aids in maintaining momentum but also helps in minimizing the typical stress associated with the building process. Your builder will draw upon their experience to estimate the time needed for each of these stages, factoring in workflows and dependencies between different tradespeople.
However, even the best-laid plans can face delays due to weather conditions, material lead times, or unexpected challenges that arise during construction. Building flexibility and contingency plans is vital. Regular status meetings with your builder will allow you to stay updated on progress and address any delays promptly.
By maintaining an adaptable mindset and clear communication, you can navigate the construction timeline with greater ease and less frustration, ensuring the build stays as close to schedule as possible.
Finishing Touches: Realizing Your Dream Home
Crafting a custom-built home is a journey paved with big decisions. From pinpointing the ideal location and meticulously outlining your design to finding a builder who shares your commitment to excellence, each decision is a step towards realizing your dream.
At Sunter Homes, we take pride in supporting our clients through each step of this journey, ensuring the dream of a custom-built home is not just a blueprint but a reality brought to life with unparalleled craftsmanship and attention to detail. Trust us to guide and support you in bringing your unique vision to life, from the initial groundbreaking all the way to the moment you step into your completed home and beyond.

Navigating Custom Home Financing: Your Guide with Sunter Homes
Financing your custom-built luxury home in Canada is an intricate process encompassing much more than securing a conventional mortgage. This endeavour reflects your achievements and aspirations, involving a substantial financial investment to create a bespoke living space that aligns with your unique lifestyle preferences. At Sunter Homes, we understand the complexities of this journey. With our expertise and the right financial partners, we assure you that navigating the financing process can be a smooth and manageable experience.
The Essence of Custom Home Financing
When you embark on the path to building a custom luxury home, you're not just planning a residence but crafting a personal retreat that embodies your aesthetic and functional desires. The Canadian custom home market is rich with opportunities to express your achievements through a property that's uniquely yours. However, realizing this vision requires a financial strategy that goes beyond what traditional home loans offer.
Securing the appropriate financing for constructing your dream home is complex, mirroring the nuanced nature of designing and building a custom luxury property. This endeavour necessitates a mortgage solution that's as grand and tailored as the home itself. You're seeking a financial partner, not just a lender—one who grasps the intricacies of building a personalized luxury home and presents mortgage options designed specifically for your project.
Navigating Mortgage Options with Ease
The journey to acquiring the right financing involves exploring various mortgage options, each with advantages and suited to different stages of the custom home construction process. From Construction Mortgages that accommodate the progressive nature of building, releasing funds as your home reaches various milestones, to Construction-to-Permanent Loans that offer a seamless financial transition from building to homeownership. There are also Land Purchase Loans and Home Equity Lines of Credit for those beginning their journey, as well as Private Mortgages and Bridge Financing for situations where traditional financing routes could be a better fit.
Understanding these options can seem daunting, but this is where Sunter Homes steps in. With our extensive experience and connections in the luxury property market, we guide our clients through the maze of custom mortgage solutions, ensuring you find competitive terms and a financial institution that understands the unique aspects of custom home construction.
The Sunter Homes Advantage: Making Complex Financing Simple
At Sunter Homes, we're not just about building exceptional properties; we're about fostering relationships and providing a holistic service that includes guiding our clients through the financial aspects of their projects. We've cultivated relationships with various financial institutions and lenders specializing in custom luxury home financing. This network includes central banks, credit unions, private lenders, wealth management firms, and specialized lending institutions—all of which offer a bespoke approach to service, prioritizing confidentiality, flexibility, and a deep understanding of the custom luxury market.
Our role is to simplify what can otherwise be a complex and overwhelming process. We help align your financial strategy with the ambitious scope of your custom project, integrating considerations for tax planning, investments, and the legacy of your estate. By strategically choosing a mortgage that reflects your financial and lifestyle aspirations, we lay a robust foundation for your luxury home to emerge.
Tailored Financial Solutions for a Tailored Living Experience
Choosing the right mortgage for your custom-built luxury home is akin to selecting the perfect materials for its construction—it's a decision that impacts the project's success and your satisfaction. Fixed-rate, variable-rate, and adjustable-rate mortgages offer different benefits, and the choice depends on your financial situation and preferences. Whether you value the stability of consistent payments or the potential savings of a variable interest rate, we can help you find a solution that fits.
But it's not just about selecting a mortgage type. The terms, the down payment size, and the loan duration are all critical decisions that influence your project's financing. At Sunter Homes, we don't expect you to navigate these decisions alone. We're here to offer our expertise, connecting you with financial advisors and mortgage brokers specializing in custom home builds, ensuring that your financing plan aligns perfectly with your immediate needs and long-term aspirations.
Your Financial Ally in Building Your Dream Home
The journey to creating your custom-built dream home is filled with decisions that shape its future. Every step is significant, from choosing the design to selecting the right materials. Your financial decisions are no less critical, laying the groundwork for the luxurious living experience you envision. With Sunter Homes, you're not just building a house; you're crafting a testament to your life's achievements, supported by a comprehensive financial strategy that we help you navigate.
Securing advantageous financing might seem like a daunting part of the luxury home-building process. Still, it's a challenge that, with the right partners, can be turned into an exciting opportunity. As you embark on this significant step, rest assured that Sunter Homes is committed to guiding you through each stage, ensuring that a solid financial foundation underpins every architectural detail and custom finish of your dream home.
We invite you to reach out to us at Sunter Homes. With our expertise and the right financial contacts, we can make financing your custom-built luxury home an easy and enjoyable part of your journey to luxurious living. Let us help you turn your unique dream into a reality, supporting your goals from groundbreaking to move-in day and beyond.
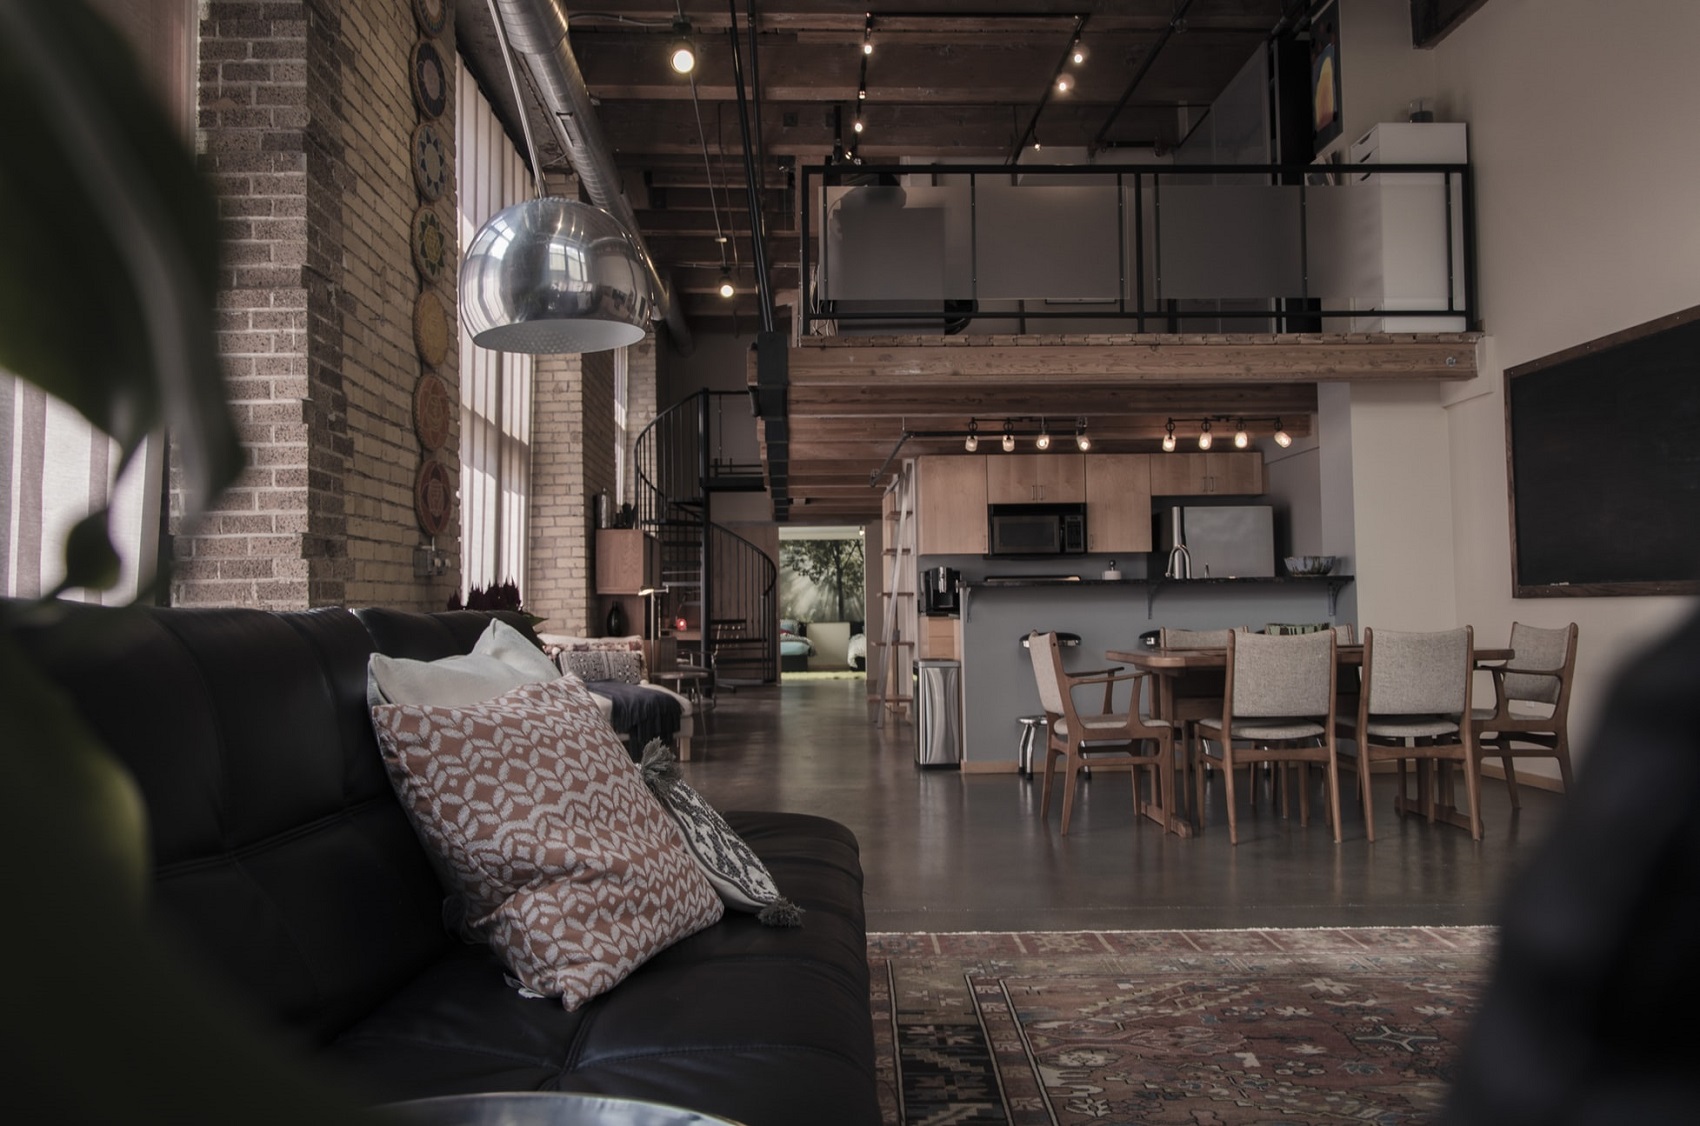
Open Vs. Closed Concept Which is Better?
Professional Advice for deciding if an open or closed floor plan is right for you
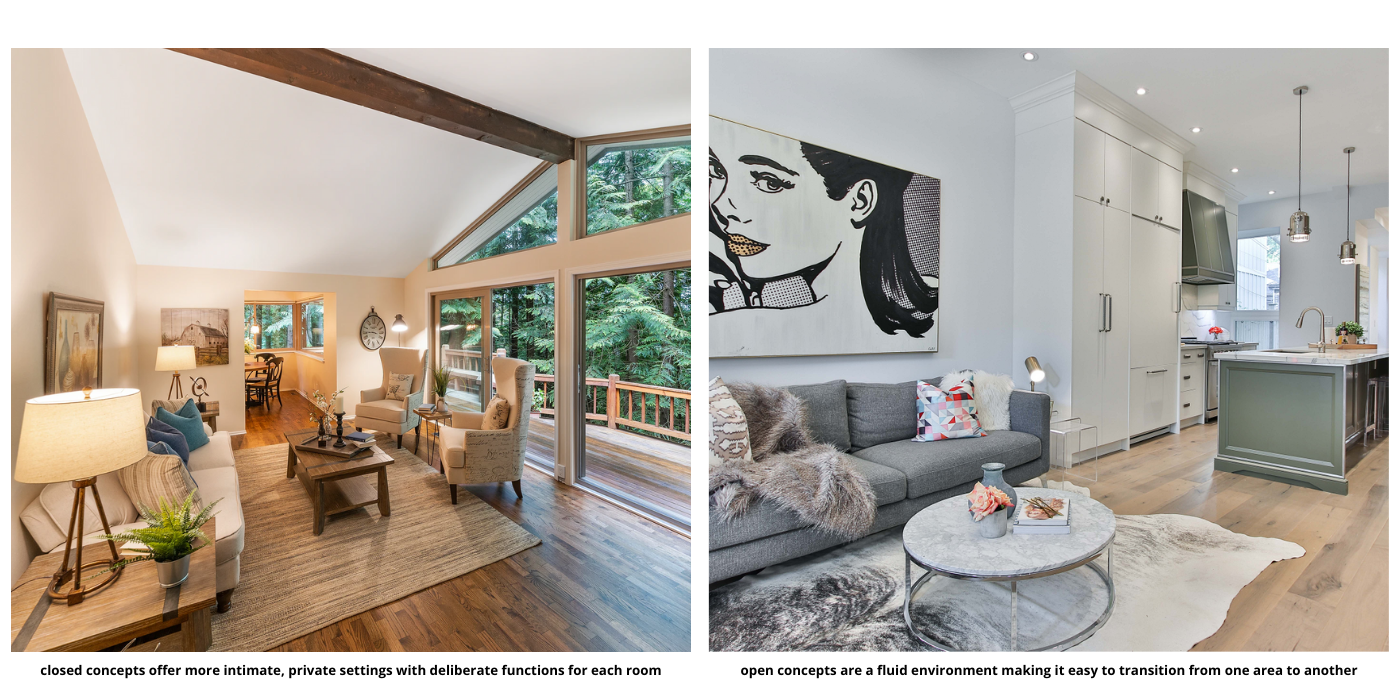
While architecture and interior design often go hand in hand and work together harmoniously, they can also end up at odds with one another. A prime example of this is the layout of your home and whether it should have a closed or open floor plan.
Read More: REFINING YOUR HOME DESIGN IDEAS WITH AN ARCHITECT
Modern, open concept floor plans are all the rage right now and are appealing from a design perspective, but they may not be the best fit for every structure and homeowner. The same applies for closed floor plans.
You might be thinking – can’t my contractor decide this for me? Even though we are a highly-experienced contractor able to provide a wealth of knowledge, when it comes to helping you make this decision, it’s important for you, the homeowner, to also have a solid understanding of the pros and cons of each floor plan option going into your custom home design project to help establish your expectations.
Read More: BUILDING THE CUSTOM HOME OF YOUR DREAMS: INSPIRATION AND DESIGN
What Is an Open Concept Home?
In open-concept homes, barriers are eliminated and traditional closed-off rooms are replaced by open spaces that aren’t separated by walls.
Such a floor plan can often exclude hallways, doors, and of course, walls, resulting in a more inviting, seemingly larger layout.
These types of floor plans have surged in popularity over the past decade as they are the epitome of contemporary design and offer homeowners a variety of benefits.
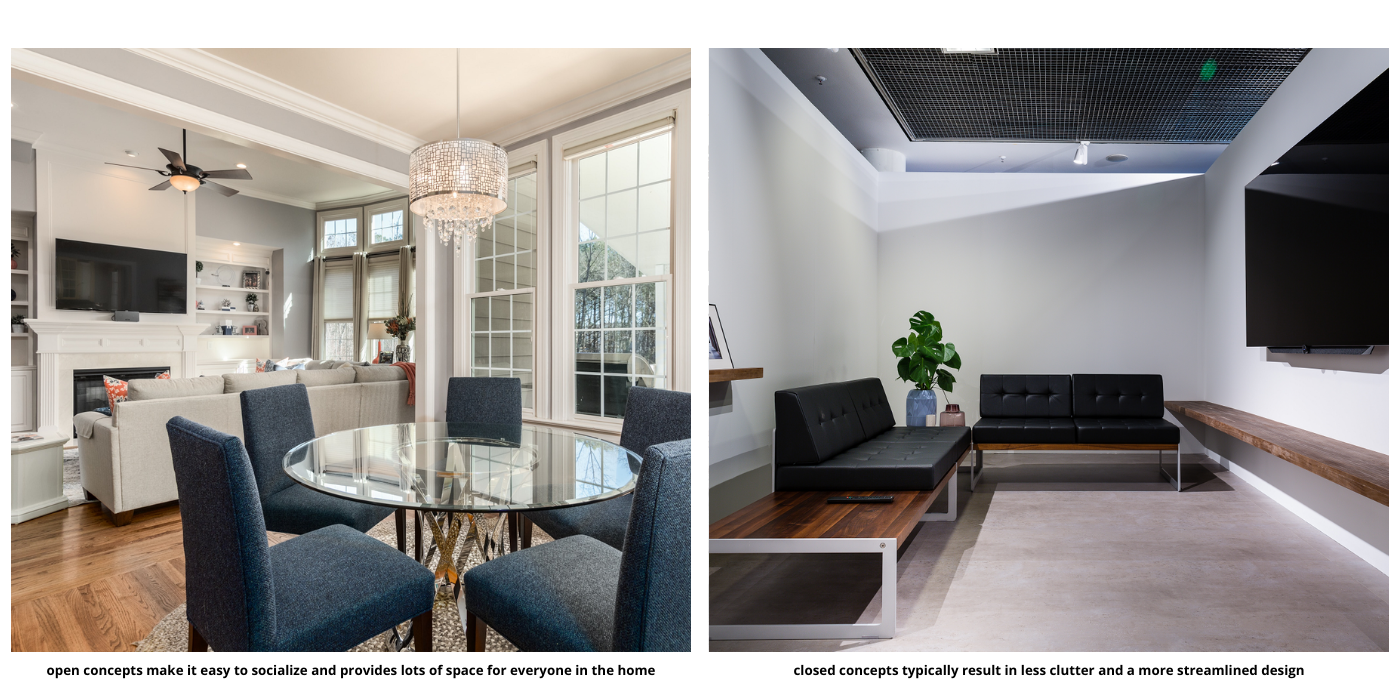
Benefits of An Open Concept Home
Space
Open-concept floor plans are excellent for creating space in a smaller home. Because there are not many walls to break up the flow of your space and divide it into separated rooms, you’ll have one large open area that looks bigger than it actually is.
This not only allows people to move around more easily but makes your home feel more spacious.
Versatility
What’s great about an open floor plan is that you can turn your space into anything you want it to be, and you don’t have to commit yourself to one permanent layout.
The absence of walls makes it easier to re-designate certain areas for different purposes and come up with creative ways to separate spaces without closing them off.
Safety
Open concept homes can be a great option for families with young children, as it makes it easier to keep an eye on your little ones at all times.
This means you can be cooking dinner in the kitchen and still be able to keep a watchful eye on your kids watching television in the living room. Or if you’re the one watching that’s watching T.V., you’ll be able to see them sneak cookies from the kitchen. It’s a win-win for parents, really.
Accessibility
With an open concept home, you have more flexibility when it comes to furniture layout and room design, allowing you to create a better flow of traffic.
This can also be incredibly beneficial for people who require mobility aids, since there are fewer doorways, hallways, and narrow passages that can be difficult to navigate.
Resale Value
Open concept is a real estate buzz word, often giving these homes an advantage when it comes to resale.
Many buyers are attracted to these types of floor plans and are often willing to pay more for a home with an open interior compared to a similar home with a closed floor plan.
Whether you’re in your forever home or plan on putting it up for sale in the future, you may want to consider an open floor plan to boost home value.
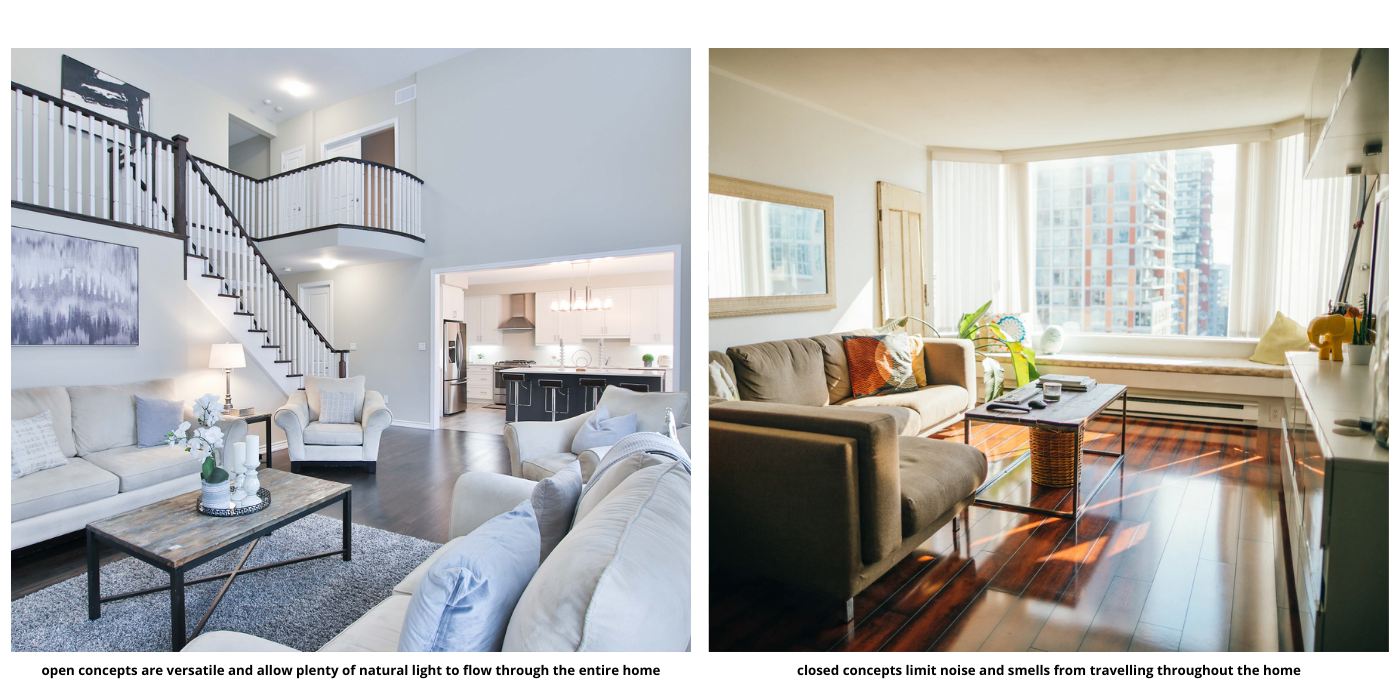
Plenty of Natural Light
A significant advantage of having an open floor plan is the amount of natural light that fills your home. It’s no surprise that sunlight is a real mood changer, so having it flood through all corner of your home can have a calming, relaxing effect.
Without walls to break up space, sunlight is able to disperse throughout the home, making the entire house feel bigger, brighter, and homier.
Downsides to an Open Floor Plan
While there are many benefits to designing a home with an open floor plan, there are some drawbacks to consider.
For example, rather than designing several individual, distinct spaces as you would with a closed floor plan, an open-concept floor plan requires a cohesive design process throughout the space with the right décor and furnishings to avoid clashing styles.
Additional downsides to an open concept home include:
- Less privacy
- Smells can travel easily throughout the home
- Noise becomes difficult to contain
- May be difficult to heat efficiently
When Would an Open Floor Plan be Recommended?
Open concept homes without dividing walls are ideal for smaller homes, as this helps to open up the space and makes your home look and feel larger than it actually is.
Here are some additional instances where an open floor plan may be recommended:
- You have a large family with small children
- You are frequently entertaining guests
- You want the freedom to switch up your layout
- You are eventually planning to sell
- You or someone in your family requires better accessibility
What Does Closed Concept Mean?
A closed concept home has a traditional floor plan and layout that features multiple rooms or separated spaces enclosed by walls and doors.
Essentially, each designated area of the home becomes its own separate space or room, including the kitchen, dining room, and living room.
Benefits of a Closed Concept Home
While open-concept has been trending in recent years, some homeowners are starting to shift away from modern floor plans in favour of more traditional, closed-off designs.
Here are a few reasons to explain this.
Privacy
While having more open space can be great for bringing families together, sometimes, you may want a bit of privacy, which can be hard to come by without many walls, doors, or separated spaces.
Closed rooms in your home’s main areas that are separated by walls and doors help you to isolate the space if need be.
Furthermore, walls and doors offer an extra layer of soundproofing for the home, giving you even more privacy than with an open concept floor plan.
Sound Control
Any family with young children knows that sound travels, and with an open layout, sound will inevitably carry throughout the house more so than with a closed-off home.
Another benefit of a closed concept home is that sound is contained within a particular room and tends to not travel as much throughout the house and disturb other family members who may need a bit of peace and quiet from time to time.
Energy Efficiency
With an open floor plan, the entire space must be heated or cooled, while traditional, closed floor plans can allow you to heat or cool certain rooms.
This means that with a closed floor plan, you are likely to pay less for heating and cooling costs.
Tidiness
With a closed floor plan, it’s easy to hide clutter in less-used rooms or put off tidying up when life gets busy.
But with an open floor plan, it’s hard to escape and ignore messes and clutter, and you may find that you have to put more effort into keeping your home tidy.
Interior Design
A closed layout is often more appealing from a design standpoint, as it allows you focus on making each room unique and design it to match your own personal taste rather than having to pick one type of design or décor for the entire home.
For example, in an open concept home, the dining area, living room, and kitchen have to be cohesive.
But with closed-concept, you get to be a bit more creative and not worry as much about picking décor that compliments the design of other rooms.
Downsides of a Closed Concept Home
Some downsides to a closed concept home include:
- Less natural light
- Smaller spaces
- Reduced accessibility
- No line of sight
Things to Take into Consideration When Choosing Open vs. Closed Concept
Do You Host A Lot of Parties and Events?
If you’re the life of the party and frequently entertain guests in your home or take pleasure in hosting extravagant dinner parties on the weekends, this is something you should keep in mind when designing or remodelling your home.
Read More: 6 TRANSFORMATIVE KITCHEN DESIGN TIPS
Having an open concept layout means you can be cooking up a storm in the kitchen, while still having the ability to interact with your guests in the living area.
An open concept layout also allows guests to move more effortlessly between the kitchen, living room, and dining area for a more inviting experience.
That being said, you’ll have to keep in mind that any messes you make in the kitchen will be visible to your guests.
Do You Prefer Smaller, Quiet Spaces?
If you enjoy having a study or other room to retreat to for some peace and quiet, and open floor plan may not suit your needs (unless you live solo, of course).
With open floor plans, everything is accessible, making it difficult to find a space to call your own and that is free of distractions.
Does Your Family Create a Lot of Noise?
Whether it’s noise from the TV, pets, chatter, the latest metal hits or clinking and rattling in the kitchen, open concept homes tend to elevate the sounds in your house. If you’re hard of hearing or don’t mind the background noise, open concept could still work for you.
But a closed layout will help to contain the noise and prevent it from spreading throughout your home.
Do You Prefer a Modern or Classic Look?
Open floor plans offer a contemporary and modern style, while closed-concept provides a more classic, traditional look.
Therefore, nailing down your own personal tastes and preferences when it comes to home design is important, as it can be a significant factor when deciding which floor plan best suits your needs.
Do You Spend a Lot of Time in The Kitchen?
If you cook a lot at home, an open concept kitchen means messy pots, pans, and dirty dishes will be visible to family and friends in other areas of the house. Not to mention, smells and sounds will inevitably travel from the kitchen out into the living room area.
Plus, keeping your kitchen clean becomes a constant chore (more so than it already is), as you can no longer put off doing the dishes by hiding them behind a wall until the next day.
On the other hand, if you spend a lot of time in the kitchen, a closed-concept design means you’re isolated from the happenings of your home. It’s all about your personal preference!
When it comes to deciding whether to choose an open or closed floor plan, you have a lot to think about.
Read More: HOME RENOVATION PLANNING FROM START TO FINISH
Ultimately, it’s important to consider your overall lifestyle and choose a layout that works for you and your family.
Before making this decision, ask for guidance from professionals to gain a better understanding of what each layout will entail so you can make an educated decision regarding what is best for your home.
At Sunter Homes, it’s our mission to build you the home you’ve always dreamed of
and work towards bringing your vision to life.
Give us a call!
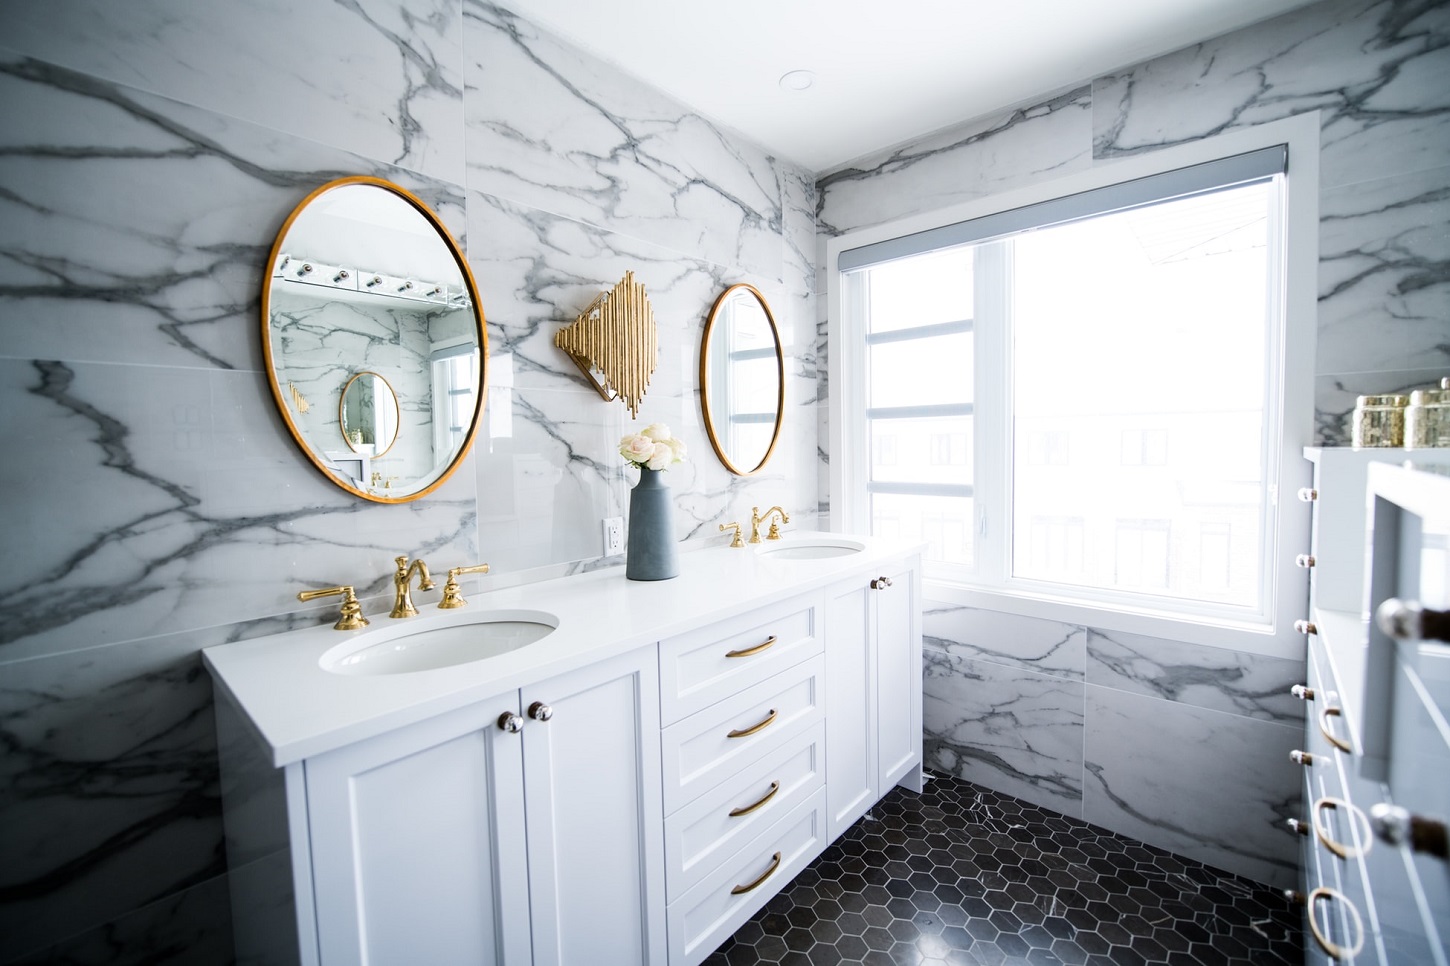
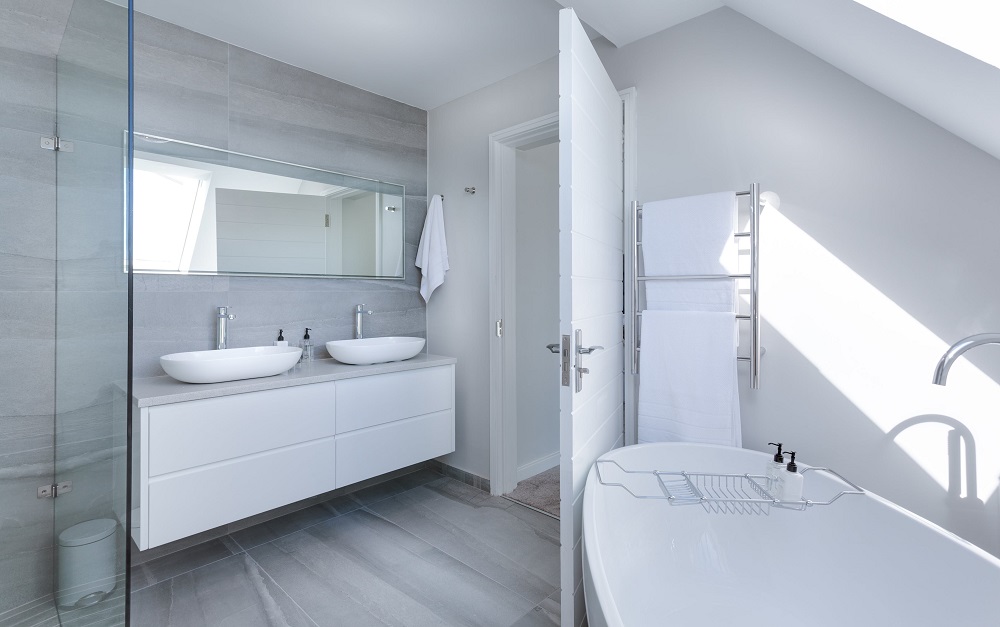
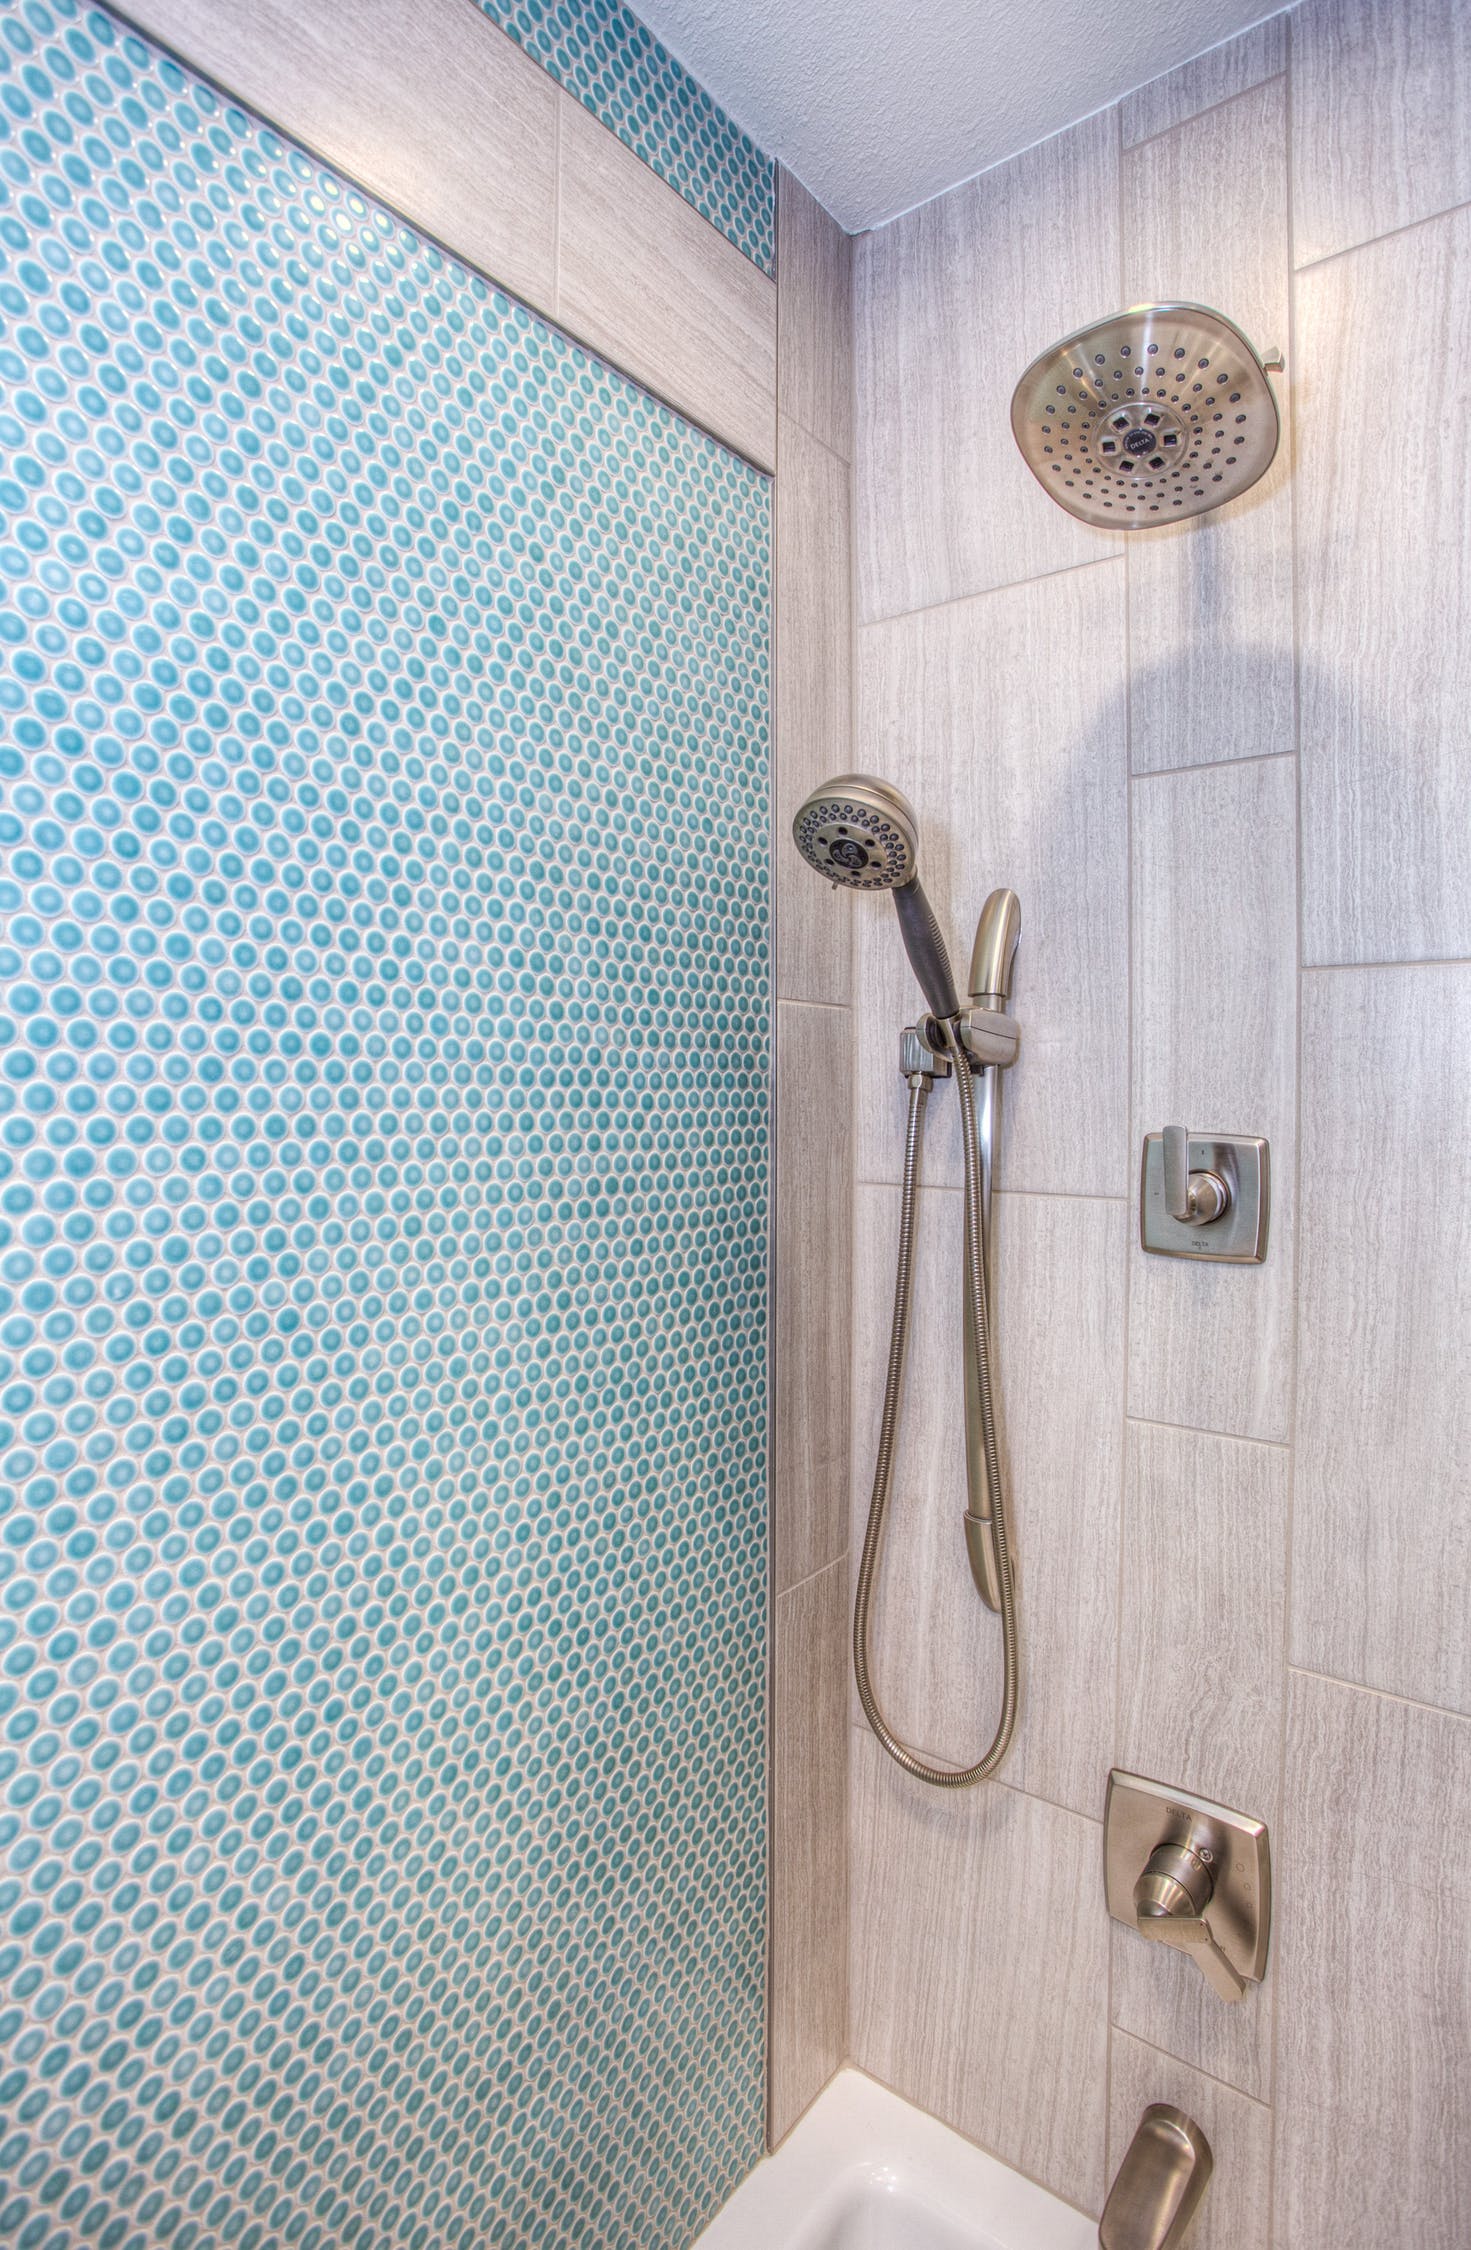
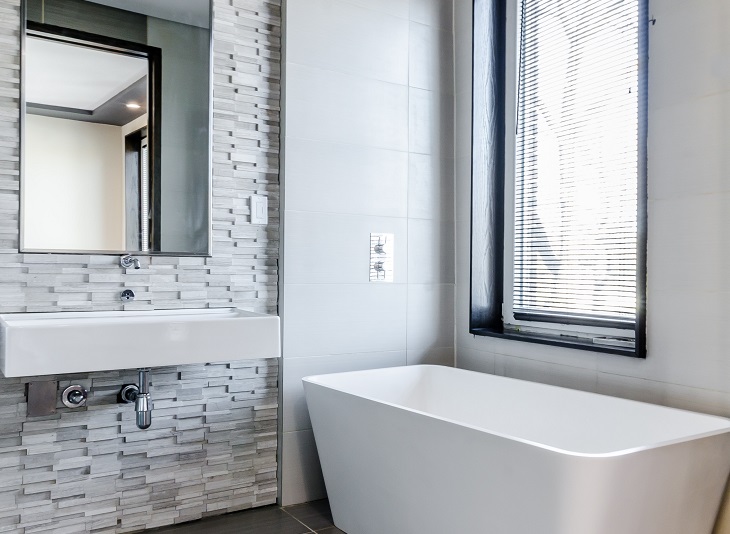
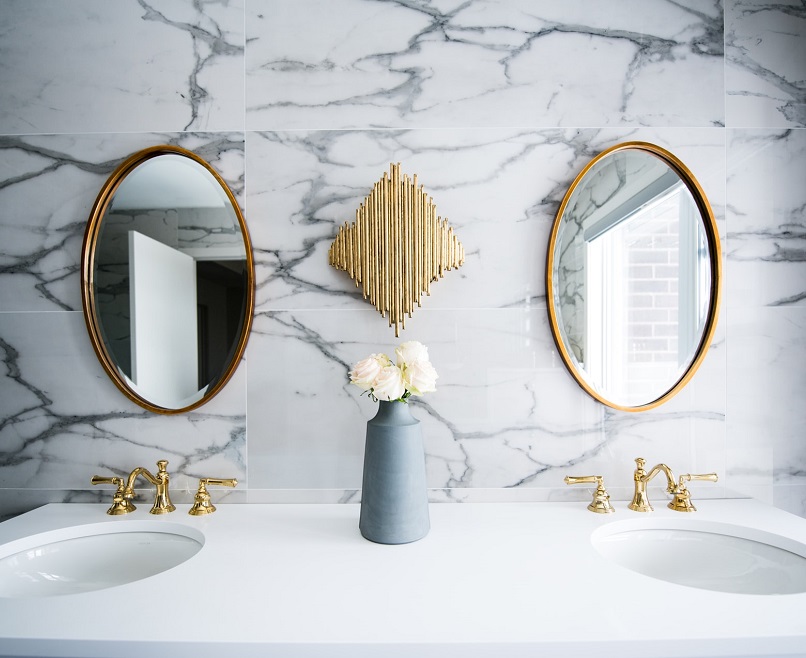
Factors to Consider When Choosing Bathroom Materials
A Guide to the Best Building Materials to Incorporate in Your Bathroom Renovation Project
When designing a custom bathroom, of course, you want your new space to be aesthetically pleasing and reflect your personality. But looks are not the only factors at play here.
Bathrooms pose a unique challenge from a design and building perspective, as all materials must withstand conditions unlike any other part of the home.
While you should have an idea of what your design will look like, your immediate preferences may not always guide your decisions since there are so many other non-aesthetic factors to consider that make up a successful bathroom renovation.
Read More: BRINGING LUXURY TO ANY BATHROOM
Read on for our guide on how aesthetics and function must work cohesively when it comes to bathroom renovations.
Considerations for Choosing Bathroom Materials
Modern, Victorian, bohemian – the options are endless!
Design
Your design preferences will heavily influence your materials, so before jumping into extensive renovations, take a step back and think long and hard about what it is that you are looking for in your new bathroom.
When meeting with your custom home contractor, come to the table with inspiration images in hand and explain your vision as clearly as possible to help ensure both sides are on the same page.
Moisture Resistance
This is perhaps the most important consideration you will need to account for when choosing bathroom materials. From showers, baths, and running tap water, bathrooms are constantly steamy and damp. For this reason, it is absolutely imperative that every design element in your bathroom – including your vanity, flooring, and walls – is able to withstand moisture.
Heat Resistance
After stepping out of the shower or bath, the warmth that fills the room often lingers, as evidenced by fogged-up mirrors and windows.
So, besides just moisture, your bathroom materials need to be durable enough to withstand heat from steam and hot hair tools that may be left out on the bathroom counter.
Among the most heat resistant materials are:
- Quartz
- Granite
- Marble
- Natural stone
- Ceramic tile
Easy to Clean
It’s no secret that bathrooms are breeding grounds for bacteria, so opt for materials that are easy to clean to help keep your bathroom germ, mould, and mildew free.
Some of the easiest to clean materials include:
- Larger tiles with thin grout lines
- Back-painted glass
- Porcelain tile
- Laminate
- Quartz
On the other hand, here are some examples of materials that tend to stain easily and are difficult to clean:
- Concrete
- Stone
- Small tiles
While beautifully detailed, smaller tiles tend to be a bit harder to keep clean
Picking Out Materials for Your Bathroom Remodel
Now that you know what to look for in bathroom materials, it’s time to start narrowing down your list.
As award-winning custom home contractors, we’re an excellent source of knowledge and can help you with this next phase in your bathroom renovation project. But to give you a better understanding of what you should be looking for, here are our tips for picking out materials for your bathroom remodel.
Flooring
When planning a bathroom remodel, one of the most important decisions you will make is choosing what type of flooring to install.
Durability is an important factor in this decision, along with moisture resistance, and slip resistance is to prevent unnecessary injury.
To help ensure your bathroom floor is slip-resistant and has some traction, look for flooring materials that have some texture to them.
And when researching different materials, don’t forget to search for information on how it will perform under stress – i.e. heavy foot traffic, heat, and water – and think about how easy it will be to clean. For example, tile tends to be more difficult to clean because of the grout, so if you’re a stickler for super clean floors, you may want to avoid smaller, more detailed tiles or avoid thick grout lines.
For easy-to-clean tiles, your best bet is to choose larger tiles with thin grout lines.
With that being said, here are some of the most popular bathroom flooring options:
- Ceramic tile
- Natural stone
- Vinyl
- Laminate
- Cork
Walls
Unlike floors, walls tend to be more forgiving when it comes to the elements of your bathroom. Because of this, you have a bit more flexibility when it comes to choosing wall materials.
However, you still need to make cognitive decisions when it comes to choosing materials that will make sure your walls are moisture-resistant to prevent things like mold, mildew, and rot.
Tiling is also a great choice for bathroom walls as it is often completely resistant to moisture and looks great from a design perspective.
Here are some common tiling options for bathroom walls:
- Subway tiles
- Mosaic tiling
- Beadboard
- Tileboard
- Natural stone tile
- Glass tile
- Porcelain tile
- Ceramic tile
Mix and match your wall materials for a unique, layered look.
If you’re opting for a fresh coat of paint in a smashing new colour, always pick out a bathroom-specific paint that is both moisture and mildew resistant.
Countertops
Your vanity takes a heavy beating over the years, having to withstand soap, water, cosmetics, harsh cleaning products and hot hair tools on its surface. It also acts as a workstation during morning rush hour and likely won’t get a much-needed wipe down until later that day.
What does this mean for your bathroom renovation? Choosing a countertop that will hold up against whatever life (and your toiletry bag) throws at it. In other words, delicate, porous, easy-to-stain surfaces need not apply.
Some beautiful and durable options for bathroom counters that are also moisture resistant include:
- Granite
- Quartzite materials
- Laminate
- Thermofoil
Cabinets
Cabinets have a wonderful ability to dramatically change the entire look and feel of your bathroom. From two-tone to see-thru, they are the facelift of any bathroom remodel. While choosing the cabinets you truly love is important, you also want them to withstand the test of time, so durability is also key when narrowing down your choices.
Some popular options for bathroom cabinetry include:
- Solid wood
- Plywood
- Medium Density Fibreboard (MDF)
- PVC
Materials to Avoid
We’ve covered the basics when dealing with which materials work best in bathroom environments, but there are some that you should completely avoid at all costs.
Here are some examples of bathroom materials we absolutely do not recommend.
Don’t be a bathroom offender, avoid these mistakes!
Wallpaper
Yes, wallpaper is super trendy and can really liven up a room. But how is wallpaper removed? You guessed it – with steam! It goes without saying that you should avoid using this material in your bathroom because it will not withstand the constant steam and moisture. Over time, you’ll notice that your wallpaper will start to lift and peel.
Hardwood
While incredibly appealing from a design standpoint, hardwood isn’t an ideal choice for bathroom flooring because it tends to warp when exposed to prolonged periods of wet and steamy conditions.
Slippery/Glossy Stone or Tile
As we previously mentioned, avoid any flooring that can become slippery when wet (unless you have one of those yellow wet floor signs), as this creates a major hazard. Simply put – you’re just waiting for an accident to happen.
Some of the most slippery materials you should try to avoid include glossy stone like marble and porcelain, and enamel-coated tile.
Carpeting
This isn’t the 70’s. Carpet has no place in bathrooms. By installing carpeting in your bathroom, you are setting yourself up for a number of problems, as it absorbs moisture and leads to mold, mildew, and rot. Just say ‘no’ to carpet.
Thin Laminate
Although laminate floors can look fantastic and withstand wear and tear from children and pets, if this is something you want in your bathroom, be sure to choose a thicker vinyl laminate that can stand up to daily heat and moisture.
Thin laminate gradually separates, while wood core laminate buckles or discolours, allowing water to seep in between the boards and leading to serious, costly damage. So, be sure to ask which laminate flooring is specifically recommended for the bathroom.
The Takeaway
While designing a bathroom is not as cut and dry as other rooms in your home, with help from home building experts, you can achieve the bathroom you’ve always wanted without sacrificing your vision.
To help you design your dream bathroom that withstands the elements,
contact Sunter Homes today!
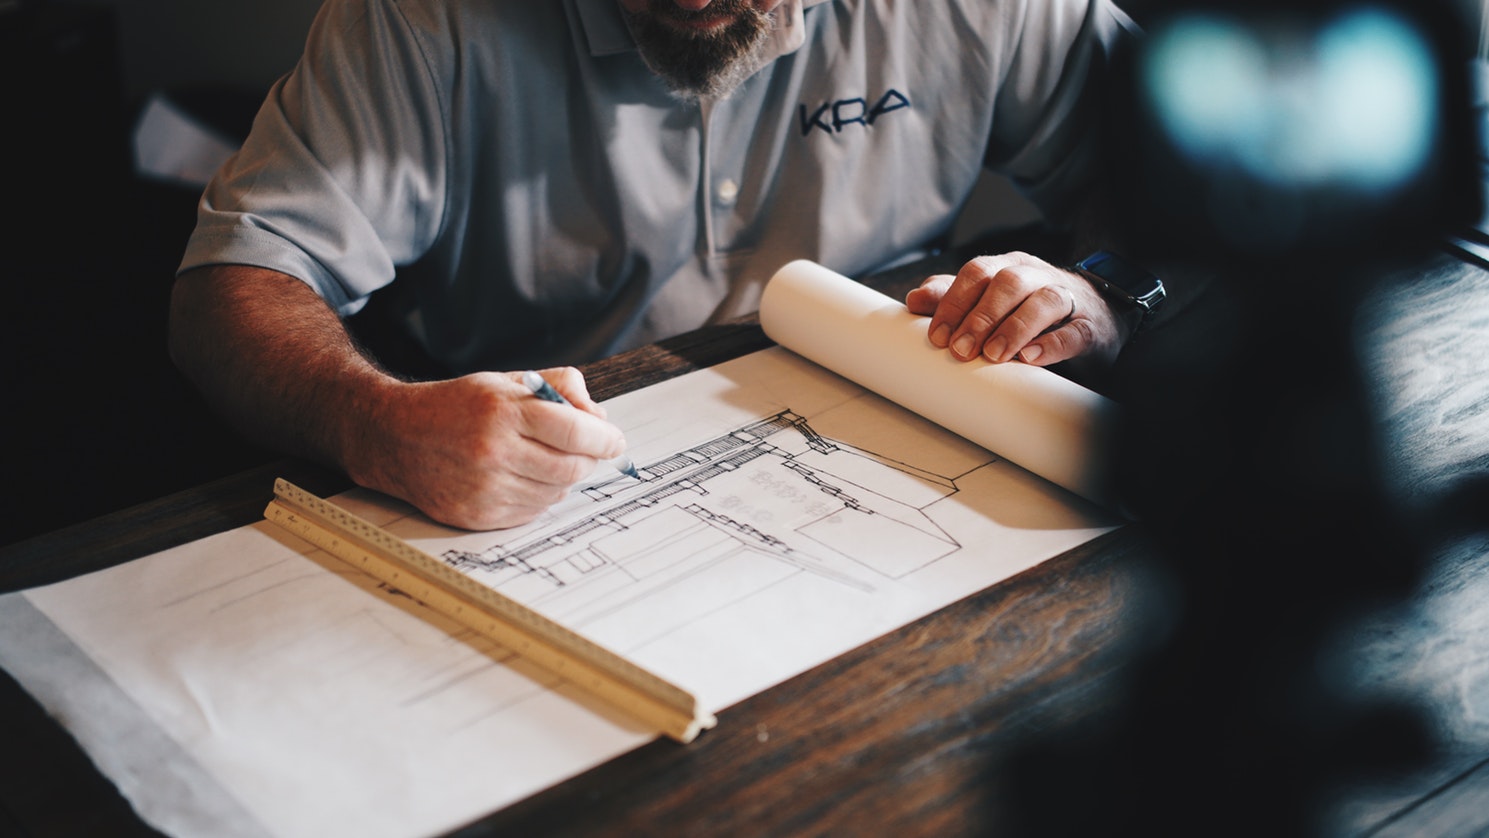
Refining Your Home Design Ideas with an Architect
From Concept to Construction Drawings and Administration, Learn How Architects Help Bring Your Home To Life
So you want to build the home of your dreams—fantastic! Custom home design and construction is a big investment, but one that’s definitely worth it. After all, how often do you get to experience a home that’s tailor-made for your family and lifestyle?
Chances are you’ve got plenty of ideas for the design and layout of your home in mind. Still, translating those ideas into concrete plans for contractors and home builders is a challenge.
That’s where architects come in.
Architects take your ideas, dreams, and inspiration and create real-world plans. They help bring your dreams to life, translating your vision into a tangible reality.
If you’re just starting down the path of custom home construction, architects can provide a helping hand along the way, keeping the creation of your home on track.
Let’s take a closer look at how architects can help you!

Architects translate your dreams into a concrete plan.
What Do Architects Do?
Let’s get the basics out of the way first: architects are individuals who design buildings, frequently overseeing their construction, as well. Architecture, after all, is the art, science, and business of building.
Equal parts designers and engineers, architects are versatile people who work with clients (whether they’re businesses, families, individuals, or organizations) to create buildings based on their needs and specifications.
Architects have extensive knowledge of not only the art of creating a building but the regulations, processes, and technical details needed to get the job done.
Architects frequently supervise teams of engineers and contractors, or they may simply be a consultant—it depends on the project.
Basically, commissioning an architect to design your home means you’re getting access to a wealth of knowledge. At Sunter Homes, we regularly work with several architects, but we’re just as comfortable working with one of your own preference.
Architects vs. Designers: What’s the Difference?
By now, you might be thinking to yourself, “Architects sound a lot like designers—so what’s the difference?”
The short answer? A lot.
The long answer? Architects typically focus on the bigger picture, but that big picture can also encompass some of the design features of a home.
Architects are most often responsible for the structure and façade of the buildings they work on, but the designs they come up with for a home may also influence the interior design.
Designers focus more on interiors and materials.
Designers, on the other hand, are almost entirely focused on the interior. While they may be able help create the spaces you’re after, their scope and expertise can be more limited.
For example, if you ask designers for two additional bedrooms for your kids, they can do it for you, no problem, but an architect can help you create additional bedrooms with enough soundproofing that you can sneak more gifts under the tree at Christmas without being heard.
What’s more, architectural services go beyond the design of your home. They help you prepare plans, handle construction documents on your behalf, and can even administer and organize the construction of your home, always making sure everything is up to code and abides by local zoning bylaws.
Do You Need an Architect for Your Custom Home?
In Ontario, it’s not necessary for an architect to design a house, but whoever designs your home and makes a submission for the building permits must be a licensed architect, a certified professional engineer (authorized b the Professional Engineers of Ontario), or a province-accredited house designer with a Building Code Identification Number (BCIN).
That being said, an architect will typically have a BCIN. What’s more, they can help you navigate the design process all the way to breaking ground and through to the finished home.
Understanding Design Phases
Perhaps one of the best ways to understand how architects can help you is to take a closer look at design phases and how they inform custom home construction.
These four phases start with high-concept, big-picture ideas and progress all the way to detailed plans used by contractors and home builders.
Conceptual Design
Conceptual design is almost exactly what it sounds like: the design of loose, even freehand, sketches and designs to help map out what you want your home to look like.
These are preliminary sets of drawing to help narrow down what you’re looking for and to rough in the basic shape and structure of your home.
During this phase, architects will likely ask about a program: a wish list or description of what you’re looking for in your home. This is your opportunity to send your architect every idea and concept that’s caught your eye and to share all your inspiration!
Conceptual designs let architects mockup ideas quickly and develop a theme.
Schematic Design
Schematic design refers specifically to more precise sketches, getting the rough conceptual ideas into something a bit more concrete that reflects exactly what you’re after.
By this point, your architect has likely developed a parti, short for “parti pris.” This is a French term that, to architects, refers to the big idea, concept, or theme behind your project. The parti informs the project and tends to fall into the schematic phase.
Design Development
This is typically where contractors and designers get a bit more involved. Design development is the phase wherein materials and details are selected. This is fairly standard practice: at Sunter Homes, we help our clients select all materials well in advance of construction.
All these decisions help create a plan of attack for building the home of your dreams. Architects can help streamline the entire process, or you can choose to work closely with your contractors when it comes to material selection.
Construction drawings are the roadmap to building your dream home.
Construction Drawings
Finally, construction drawings are the full plans and designs that accurately describe exactly what will be built.
These drawings are the final design, and incorporate everything from exterior elevations (profile views of the building’s design), floor plans, sections (quite literally cross-sections that can help contractors create framing and other structural elements), and details (the specific elements where a designer or architect wants to convey greater information).
Construction drawings, in fact, are blueprints. “Blueprint” is a somewhat outdated term, as most construction drawings are done now on white paper, with no need for the chemically treated blue paper that construction drawings were once created on.
Construction drawings are the roadmap to creating the home of your dreams.
Architects Work with Your Contractors
It’s easy to get a bit lost in defining the roles and responsibilities of architects, designers, and contractors, but it’s important to remember that architects work with your team. After all, everyone you’ve hired to build your home is after the same goal!
While there is no stipulation that you must hire an architect for your custom home, they’re an incredibly invaluable resource to draw upon. From the initial design phases straight through to construction administration, they’re ready to help with every aspect of custom home construction—and then some.
At Sunter Homes, we have the pleasure of being able to work with some very talented architects. We’re always happy to make recommendations and introductions, but we’re equally at home working with an architect you’ve contracted ahead of time.
Our goal, as always, is to create beauty built to last.
Building the Custom Home of Your Dreams: Bringing Your Dream to Life
Putting the Finishing Touches on Your Dream Home—Ahead of Time
So, you’ve designed the home of your dreams, you’ve broken ground, and you’re knee-deep in the building process. The roof is up, the floors are roughed in, and it’s time to start considering how the home will look and feel once it’s finished.
Some contractors wait until this moment to discuss ways to customize and personalize your home, roughing in a few basic ideas during your initial consultation but waiting to finalize until a later date.
There are two sides to this: yes, you get a better sense of how your home will look in the moment, and it takes out a lot of the guesswork, but this can come with added costs.
It’s understandable why so many people want to wait to settle on these things. After all, it can be difficult to imagine how your finished home will look while it’s being built. What’s more, self-doubt can creep in. How can you be completely certain the materials you’ve chosen will look good together until you see them side by side, in your home?
Simple: you work with experts who’ll help you navigate the design and construction process from start to finish.
At Sunter Homes, we make it a priority to help our clients choose the materials that best reflect their style and what they want, well before we break ground. You could say we help put the finishing touches on a home right at the start!
With that in mind, here are a few things to keep in mind while putting the “finishing touches” on your custom home—and how your custom home builders can help.
Choosing Finishing Materials
Again, if you’re waiting until the end to choose materials, you’re in for a bit of stress. We recommend choosing finishing materials well in advance to take out the guesswork.
Trusted contractors will provide you with a wealth of options and styles, including samples, to help you better visualize how your home will look once it’s finished.
Beautiful Flooring
Flooring provides endless potential for further customization and personalization in your home. While hardwood floors remain popular for their versatility and timeless appeal, there are several other options you can consider.
Unique tilework in kitchens and bathrooms allows you to create patterns that please the eye. You can even use these patterns and designs to compliment (or even offset) other materials and backsplash tilework.
If you’re keen on sticking to wooden flooring, then you might want to consider exploring different wood grains and stains. Parquet flooring can let you create subtle (or bold) patterns, too.
There are also many varieties of synthetic materials, like vinyl, that allow even greater customization for the exact look and feel you’re after.
Custom Cabinetry
Custom cabinetry is an amazing way to provide a beautiful finishing touch to your kitchen, bathroom, or closet. Built to your specifications, these cabinets provide elegant storage solutions throughout your home.
Most cabinet makers provide a range of materials and design options for you to choose from, but you can go a step further and have completely custom cabinets made for your home.
Even if you’re sticking to basic shaker-style storage options, cabinet hardware presents another amazing way for you to add a personal touch to any cabinet.
Stunning Countertops
Marble countertops remain, in the eyes of many, the gold standard of high-quality countertop material, but with the wide variety of materials now available, customizing the look and feel of your kitchen has never been easier.
Countertops are an often-divisive topic in home décor and design; what’s beautiful to some will be a “what were they thinking?” decision to others, so at the end of the day, remember that it’s about bringing your vision to life.
Many new home builds use plastic laminates like Formica as stock choice, but you can absolutely go to a higher-end marble or quartz. We’ve discussed the pros and cons of various countertop materials in the past, but let’s take a quick moment to recap:
- Quartz offers the stone look of marble with greater durability.
- Granite offers truly unique appearances and is durable but needs regular resealing.
- Soapstone, limestone, and marble are classic looks that can’t be beat but are more susceptible to nicks, scratches, and heat damage.
- Butcher block countertops are a classic, warm look with practical functionality, but need regular maintenance.
- Laminates are low-cost and infinitely customizable (and look great, these days) but cuts and scratches will cause visible damage.
- Concrete’s industrial look is durable and customizable but needs sealing to prevent staining.
- Recycled glass is an ultra-contemporary style, but heat-resistance and durability may vary depending on the manufacturer.
Basically, you’re spoiled for choice!
Crown Molding—Don’t Skip the Details
Crown molding can be thought of as the finishing touch on any beautifully constructed or renovated room.
This fine molding generally caps (or crowns) walls, creating an elegant and refined transition from wall to ceiling. Molding helps give greater depth and definition to a space, subtly influencing its appearance.
There are many classically influenced rules of thumb for designing crown molding, but generally speaking, it’s important to balance angles and contours with neutral space in the design.
There are three key things to keep in mind when designing crown molding: the design should be proportional (think about the Golden Ratio), should provide neutral spaces for the eyes to rest, and offer simple, complementary contours.
Crown molding is a highly detailed finishing touch for any home, but one that’s worth the time and investment to create a unique look that you can enjoy for years to come.
A Fresh Coat of Paint
Your home is fully built to your exact specifications, you’ve got all the materials and features you’ve been after… now what?
It’s time to paint!
This is perhaps one of the easiest ways to truly personalize your custom home, but it’s also arguably one of the toughest decisions to make. After all, there are any number of shades you can use to create the look and feel you’re after.
So, what colours should you choose?
Let’s cover a few basics first. How familiar are you with the colour wheel? It starts with the three primary colours—red, yellow, and blue. Red can be found on the wheel at the 12:00 position, yellow at 4:00, and blue at 8:00.
All other colours are made from various combinations of these primary colours, and fall at different positions on the wheel, cycling from warm colours to cooler colours and back again.
Colours next to each other on the wheel pair well, in most cases, but one will always be prominent. Colours directly across from each other, meanwhile, are complementary and play off each other nicely; for example, blue and orange are complementary colours.
You may want subtle, understated tones in one room and cooler tones in another. White is a great way to make a small room feel more expansive, and touches and pops of colour here and there can draw the eye and create unique focal points.
Making Your Custom House a Home
Really, we’re only scratching the surface of what’s possible with these finishing touches. A huge part of how your new custom home looks and feels will depend on the furniture and décor you choose, too.
The above tips are a great way to get started with these finishing touches to truly bring your dream home to life, but they’re just that: a starting point.
If you’re looking to create something truly beautiful that stands the test of time, get in touch with Sunter Homes today to discuss your vision.
We’ll help show you how we can bring it to life.
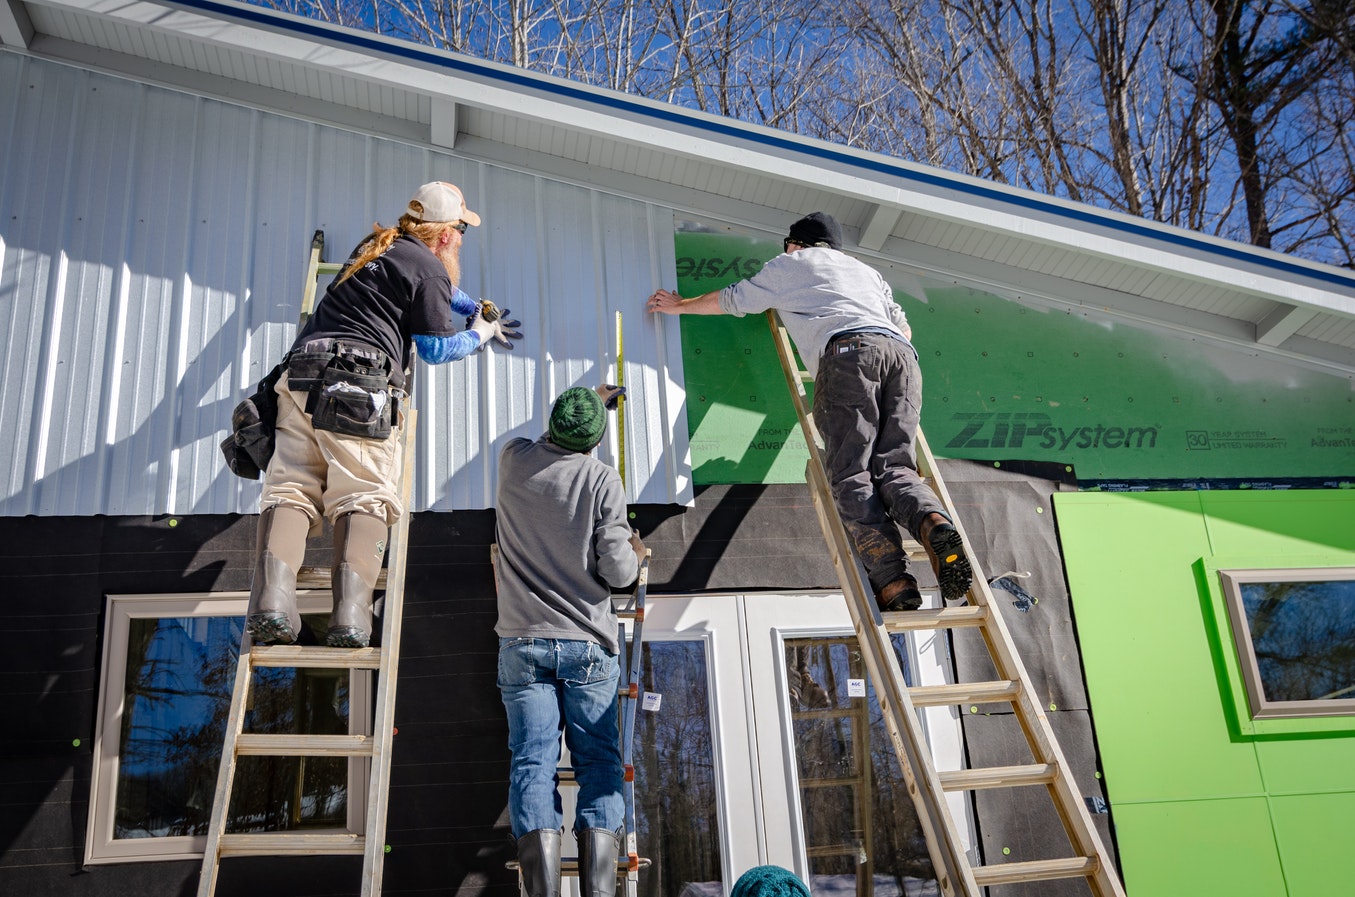
Building the Custom Home of Your Dreams:
Breaking Ground And Building
A Look at the Construction Process for Building Custom Homes from Start to Finish
You’ve decided you want to build the custom home of your dreams.
You’ve found designers, architects, and contractors you’re excited to work with.
Your designs and plans are ready to go.
Now it’s time to break ground and start the build!
This is an incredibly exciting time in any home construction project. It’s where the rubber meets the road, so to speak, and you can actually see your vision come to life before your eyes.
As exciting a time as it is, it can still feel a bit overwhelming. It’s your home, after all, and you want to be involved in every stage of construction.
Chances are, you’re going to have a lot of questions for your contractors, and they’re going to have a lot of questions for you.
That’s why we’ve put together this helpful guide that you can use to track the construction of your home, and to give you an idea of what to expect during the entire process.
Let’s take a look!
Site Prep and Foundations
Unless you’ve got a lot prepped and ready to go, it’ll need to be cleared of debris before you can properly break ground. This means hauling away stones and uprooting vegetation that’ll get in the way.
You’ll also need to level the site, which is typically accomplished with a backhoe and bulldozer.
Once that’s done, though, your construction team can break ground.
While the team here at Sunter Homes will always handle every aspect of construction on your behalf, we definitely understand when our clients want to be the ones to break ground.

It’s a special moment, after all—this is the very first step you take towards building your dream home, after all.
If you want to take the first swing with a pickaxe or be the first person to use a shovel while digging out foundations, let your contractors know. You don’t need to do the whole job, but it’s a fun moment that’s worth a photo, at least!
Once the crew levels the site, they put up wooden forms to create a template for the foundation of your home, dig holes and trenches, and install footings. They’ll also dig a well or space for a septic tank if needed.
If your home has a basement, this is the point at which it’ll be dug out.
From there, it’s time to form and pour concrete footings before forming and pouring the walls of the foundation.
For slab-on-grade, the crew digs, forms, and pours footings, levelling the area between them. They’ll fit this area with utility runs and pour the slab.
After concrete’s been poured, it needs to cure. Construction typically stops at this point while the concrete sets and dries.
After the concrete is cured, your contractors install a waterproof membrane for the foundation walls in addition to drains, sewer and water taps, and other necessary plumbing features.
They will also backfill excavated dirt in the space around the foundation wall.
At this point, an inspector will check out the site to ensure your foundation is up to code. Once they sign off, your contractors remove the concrete forms and move onto the framing.
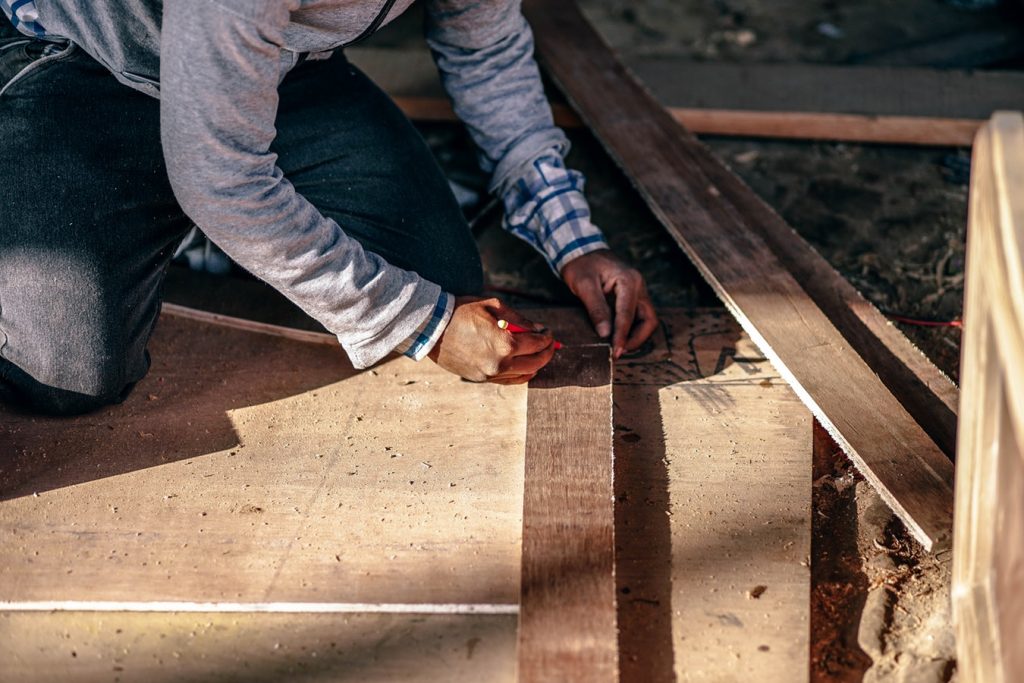
Building Framing
Think of building framing as the skeleton of your home. This is what gives it shape and supports the building as a whole.
Your home builders start by creating rough framing, including floor systems, walls, and roofing.
Plywood and oriented strand board (OSB) sheathing are commonly used for exterior walls and roofing.
The sheathing gets covered by a protective barrier—what’s known as a house wrap. This keeps water out of the home during the construction process while letting water vapour escape.
Windows and exterior doors often go in at this stage. Once the framing and shell are complete, you’ll get another visit from an inspector.
Next, it’s time to install plumbing, electrical wiring, and other features.
Plumbing, Electrical, And HVAC Installation
Usually, while the roofing and siding are being installed, electricians and plumbers will start running wires and pipes through the ceiling, floors, and interior walls.
Plumbers will install sewer lines and water supply lines. This is also when tubs and showers are brought into the home.
If you’re worried about having to hire more contractors, rest assured: the contractors you’re working with will bring in the experts they need for certain tasks if they can’t do them on their own.
Here at Sunter Homes, we’re able to handle every aspect of custom home construction, and we love finding elegant solutions to wiring and plumbing layouts.
Typically, this is the point at which HVAC (heating, ventilation, and air conditioning) contractors will install vents and ductwork for your home’s new HVAC system. They will install vent pipes through the roof, and they will also install a furnace.
Once the roof is installed, the house is considered “dried in” and safe for electricians to install receptacles for outlets, lights, and switches, and run wires from the breaker panel to these receptacles.
One of the best benefits of a custom home is that you can get it wired up in a way that works for your needs.

This means custom wiring solutions for home theatres, home offices, telephones, and even power outlet placement.
Assuming it’s up to code, there’s no reason you can’t customize these aspects to your heart’s content.
Once it’s all done, it’s time for—you guessed it—another inspection before moving onto insulation and drywalling.
Insulation, Drywalling, And Interior Textures
Home builders will install insulation in the floors above unfinished basements, walls, and ceilings, including the attic.
There are several types of insulation used in new custom homes, some with better thermal performance than others.
Before you break ground, your contractors will discuss your options with you and how they’ll impact your budget.
Once the insulation is installed, home contractors will hang the drywall and complete the interior drywall textures if applicable. They will also apply a primer coat of paint once the drywall is hung and taped.
During this time, interior doors, baseboards, door casings, window sills, mouldings, stair balusters, and other decorative trim can be installed.
The walls will get a finishing coat of paint and/or wallpaper at this point.
Finishing the Exterior
Your contractors will install exterior finishes such as stucco, brick, stone, and siding.
Exterior driveways, walkways, and patios are installed during this stage. Exterior finish grading is completed to provide proper drainage away from the home.
Next, it’s time for interior details!

Flooring, Counters, And More
This is one of the biggest parts of building a custom home, though not necessarily due to the amount of time it takes.
Interior design details are, after all, features that homeowners put a lot of time an energy into.
At this stage of construction, your contractors will install hard-surface floorings, such as ceramic tile, wood, or vinyl.
It’s also common for countertops to be placed at this phase, and, by extension, sinks and faucets.
Next, it’s time to complete the electrical panel with light fixtures, outlets, and switches. HVAC technicians will install the HVAC equipment, and the registers will be completed.
During the final stage of home construction:
- Mirrors, shower doors, and carpeting will be installed.
- Exterior landscaping and/or cleanup will finish, including planting trees, shrubs, and resodding grass.
- You’ll get one more building code inspection.
- Finally, it’s time for a final walk-through with your contractors.
During your walk-through, your builders and contractors will take you through the home and offer detailed explanations of all features, systems, warranties, and offer maintenance tips.
This is an opportunity to ask questions, inspect your home for yourself, and address any minor issues you may notice, as unlikely as they may be.
And, lo and behold, you have your brand-new custom home!
Getting Through Home Construction
As with any construction project, it’s totally normal to feel stressed during custom home construction.
You may be trying to coordinate moving out of your current home on top of staying involved with progress with your home, not to mention a day job and family commitments.
You need to know you can trust the contractors and experts you’re working with, which is why we recommend soliciting recommendations from family and friends before making a final decision on your contractors.
Your contractors, designer, and architect should all understand your vision and work towards it in tandem.
At Sunter Homes, we make your vision for your home our number one priority and are dedicated to making custom home construction more than a project; we want it to be a memorable, enjoyable experience for you and your family.
We know how important consistent communication and reliable planning are. We’re ready to help you with everything from suggestions and recommendations to timelines and budget insights.
Building a custom home can be overwhelming. But with the right team, open communication, and realistic expectations, the home construction process can be more exciting than stressful.